How to Make Colloidal Gold The Easy Way

Why Make Colloidal Gold?
If you've landed here, you're most likely a chemistry nerd or you're part of the natural health community and read something you like about colloidal gold or monatomic gold, saw the price and was like "No way I'm paying that! Let me see how difficult it would be to make my own."
Good news! I'm here to tell you it's possible, It's relatively easy to do and can be done with minimal equipment. In other words, you don't have to be a scientist to understand what's going on. Plus, I'm going to explain everything in a way that even a baby could understand.
If you've ever made colloidal silver before, then this process is going to be a breeze and very familiar to you, as it's pretty much the same process other than adding extra ingredients into your solution.
How I Stumbled Across it?
The way I found out about colloidal gold is after I was searching on one of my favourite facebook groups "The Copper Revolution". I'd noticed that Jason Hommel (who is the group owner) was consuming and using this in his health protocol boasting all sorts of benefits. The main ones being a cognition increase and the ability to bind and possibly chelate mercury, which I'll speak about later.
I was excited! A new thing I had not tried before that can make me smarter — sign me up.
But, my excitement was short-lived — after I started searching around online and found out just how expensive colloidal gold is. Thoughts started racing through my head — is it expensive because it works? Is this all a giant scam? Will the product live up to the hype?
This is when I had a big brain moment. I started to check the concentrations of products online — 30ppm (parts per million), 60ppm, and 120ppm seemed to be the most common. I realized that even when you take the highest concentration of 120ppm contained in a 500ml bottle, you’re still only using around 60mg of actual gold (elemental gold) per bottle. But the price of this bottle was £90 ($115); this means, if the current gold price per gram, as of the time of writing, is £75 ($95), then you’re paying almost the same price for 60mg of gold as you would for an entire gram! All other ingredients used are very inexpensive.
So, I went on a journey of figuring out how to make this stuff myself. That’s what led me to collate all the information I’ve learned into this blog post — to save you time and money, sparing you the trial and error process.
Claimed benefits
- Improves ADHD symptoms
- Improves IQ
- Improves Intuition
- Better Sleep
- More spiritually connected
- Degrades (destroys) Graphene oxide — See VIDEO (Not the best quality but proves the point)
- Chelates Mercury — Check out what happens HERE when you put gold onto mercury.
The Colloidal Gold Making Process
Now the moment you've been waiting for — I'm going to show you how easily you can make colloidal gold at home with minimal equipment and supplies. Let's get started!
Safety First
Before we dive into anything, a little disclaimer: I'm not a doctor or chemist. I'm just somebody very interested in health and nutrition, showing you the process for informational purposes to demonstrate the process I personally use. If you choose to follow the process below and consume what you've made, then you do so at your own risk.
The next thing we have to talk about is your power supply. During this process, you’ll be using a source of electricity. Although the voltages will never go high enough to cause serious harm, you still need to be careful not to accidentally give yourself a shock ⚡— that wouldn’t be ideal, would it?
With that being said, provided you have similar equipment and supplies that I’ve listed below, you’ll produce some very pure and beautiful-looking colloidal gold — which is similar to, if not exactly the same as, what you would buy in a store.
Equipment Required
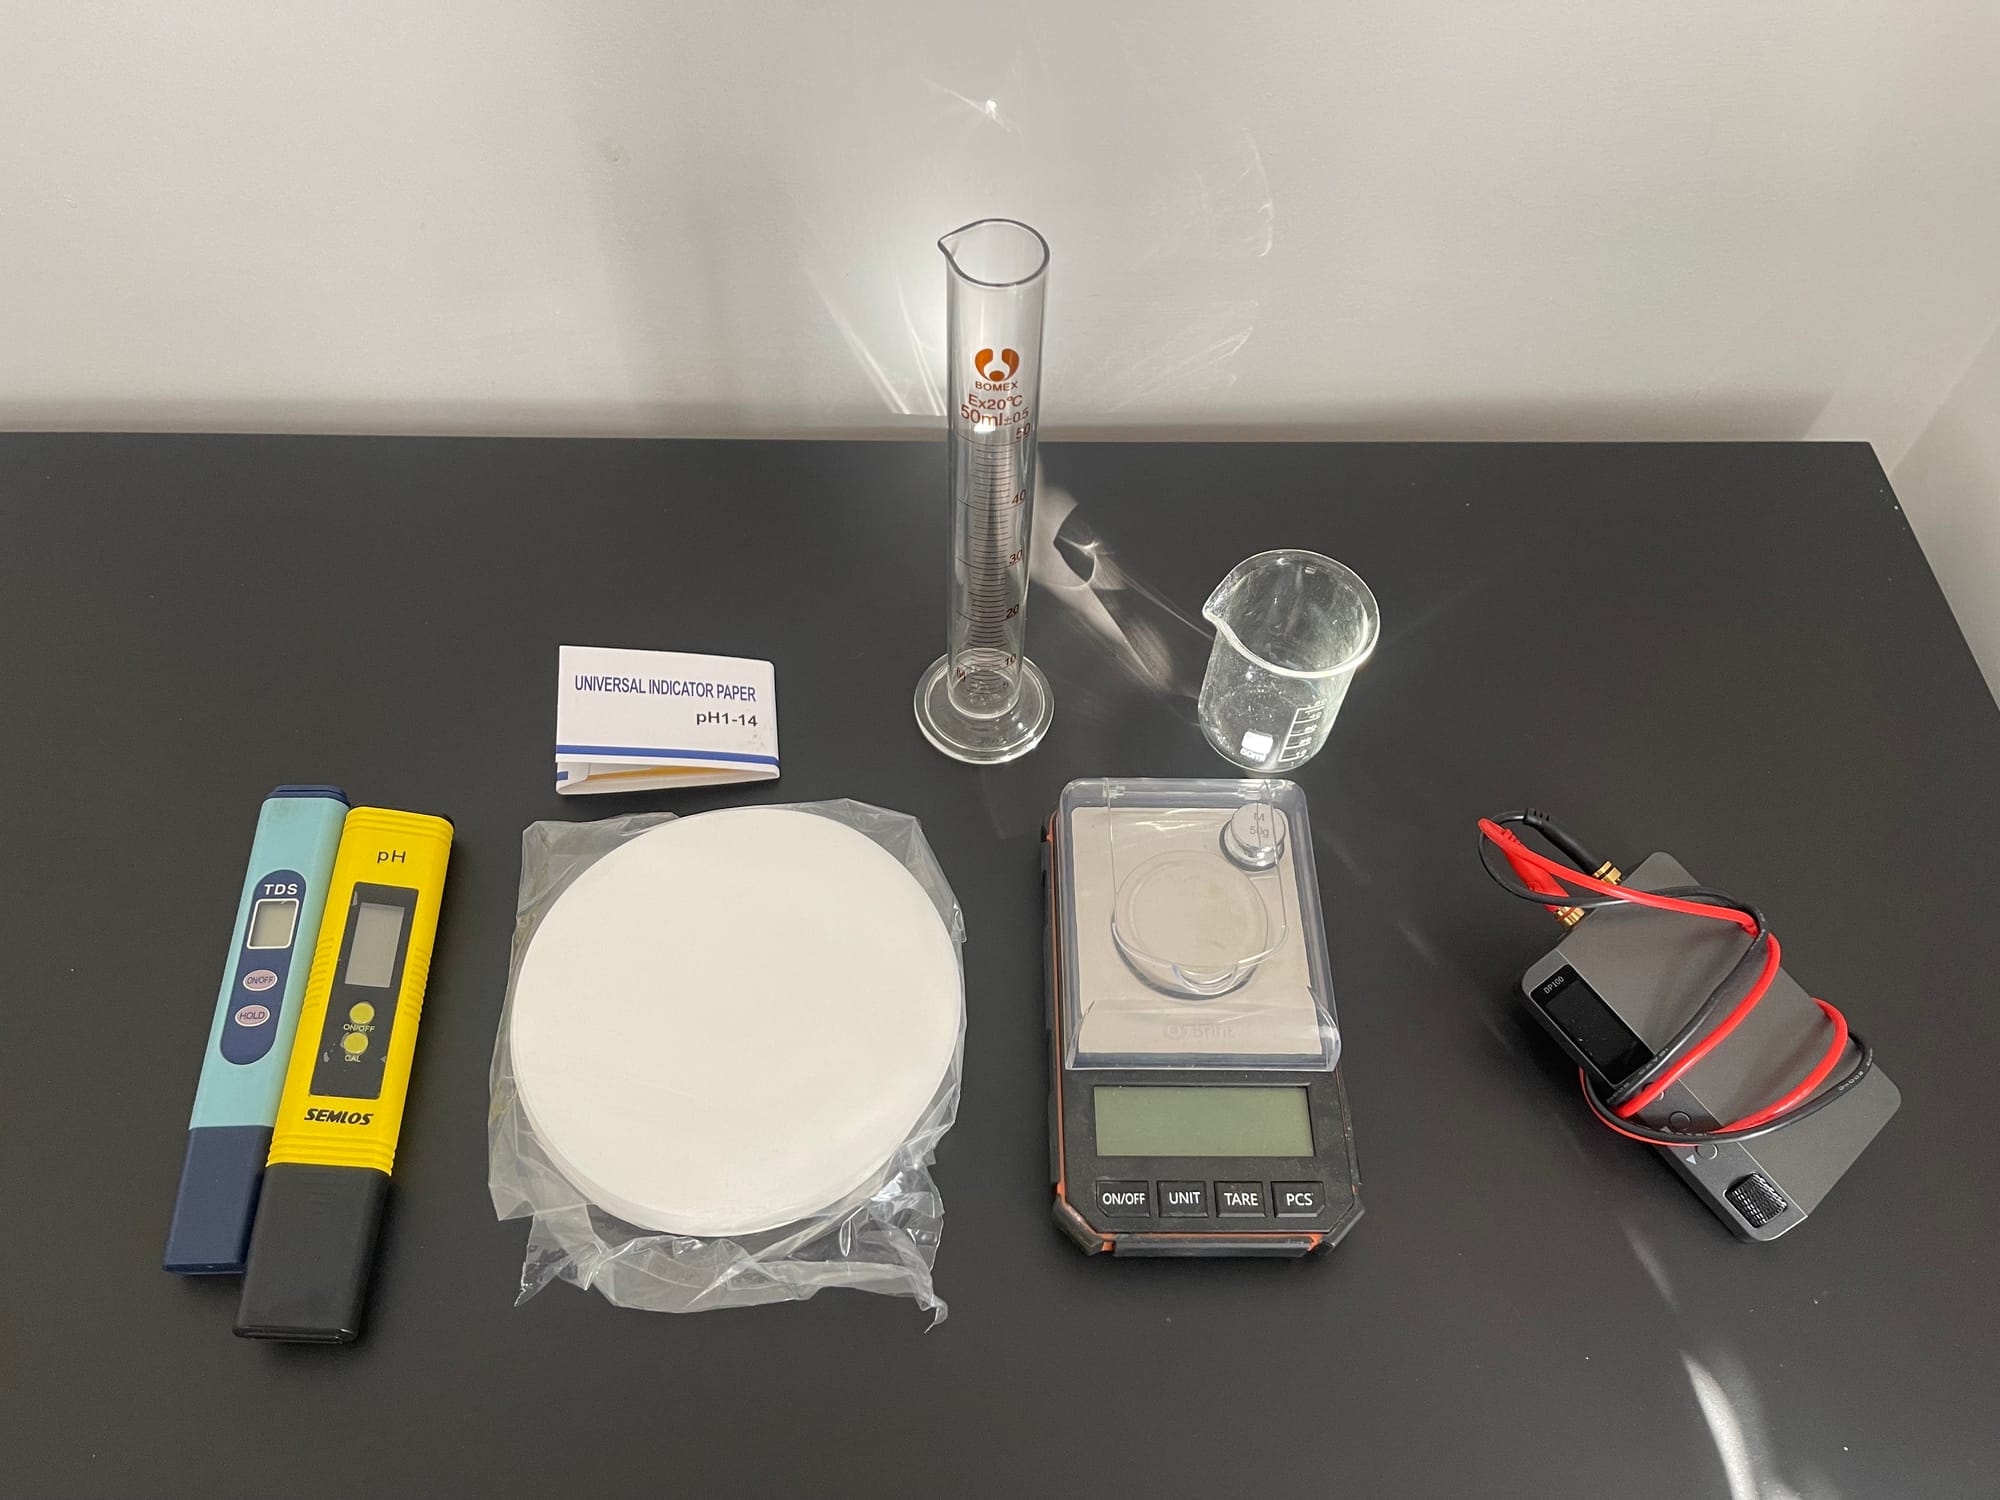
- Power supply: Must provide a voltage of 12V+ and 1 amp or more. (Ensure it has alligator clips or another method for clipping onto something.)
- Glass container: A borosilicate glass beaker is ideal, but a Pyrex jug (commonly found in the kitchen) will work just fine. Just make sure it’s glass that can withstand heat without breaking.
- Heat source: This can be a hot plate, Bunsen burner, gas stove, etc. You need something that can heat liquid up to 90°C (194°F) and maintain that temperature.
- Temperature probe or heat measuring device: You’ll need a device that can measure the temperature of the liquid. Ideally, it should be made from glass, but a metal probe will work as well.
Optional
- Cover for your glass container: A piece of glass, such as a ‘watch glass,’ is commonly used, but anything that helps prevent water from evaporating will work fine.
- Filter papers / Coffee filters: Used to filter your colloidal gold solution at the end to remove any dust or debris that may have fallen in.
- Total Dissolved Solids (TDS) meter: Used to measure the Parts Per Million (PPM) of dissolved solids in your solution throughout the process. As well checking your distilled water is pure
- pH strips / Electric pH device: To ensure your colloidal gold has the correct pH level at the end.
- Milligram scale (accurate to 0.000 grams): To measure how much gold has been used up during the process and to measure out ingredients.
- Measuring Beaker / Graduated Cylinder: To help you measure out liquids easier throughout the process, so you don't have to reply on scales.
Chemicals / Materials Required
- Pure sea salt / table salt (Sodium Chloride): Ensure it’s non-iodized and just pure salt. Iodized salt will interfere with the process.
- 24 Carat (or Karat in the US) 99.9% pure gold: I’ll explain in detail how to obtain this gold and the specific type throughout the guide.
- Tri-Sodium Citrate Dihydrate (also known as Sodium Citrate): Used as the primary reducing agent; more on this later in the guide.
- Distilled water or 0 total dissolved solids (TDS) water: Do not use mineral water or tap water.
Optional
- Corn Syrup, glucose / dextrose, or table sugar: Another reducing agent.
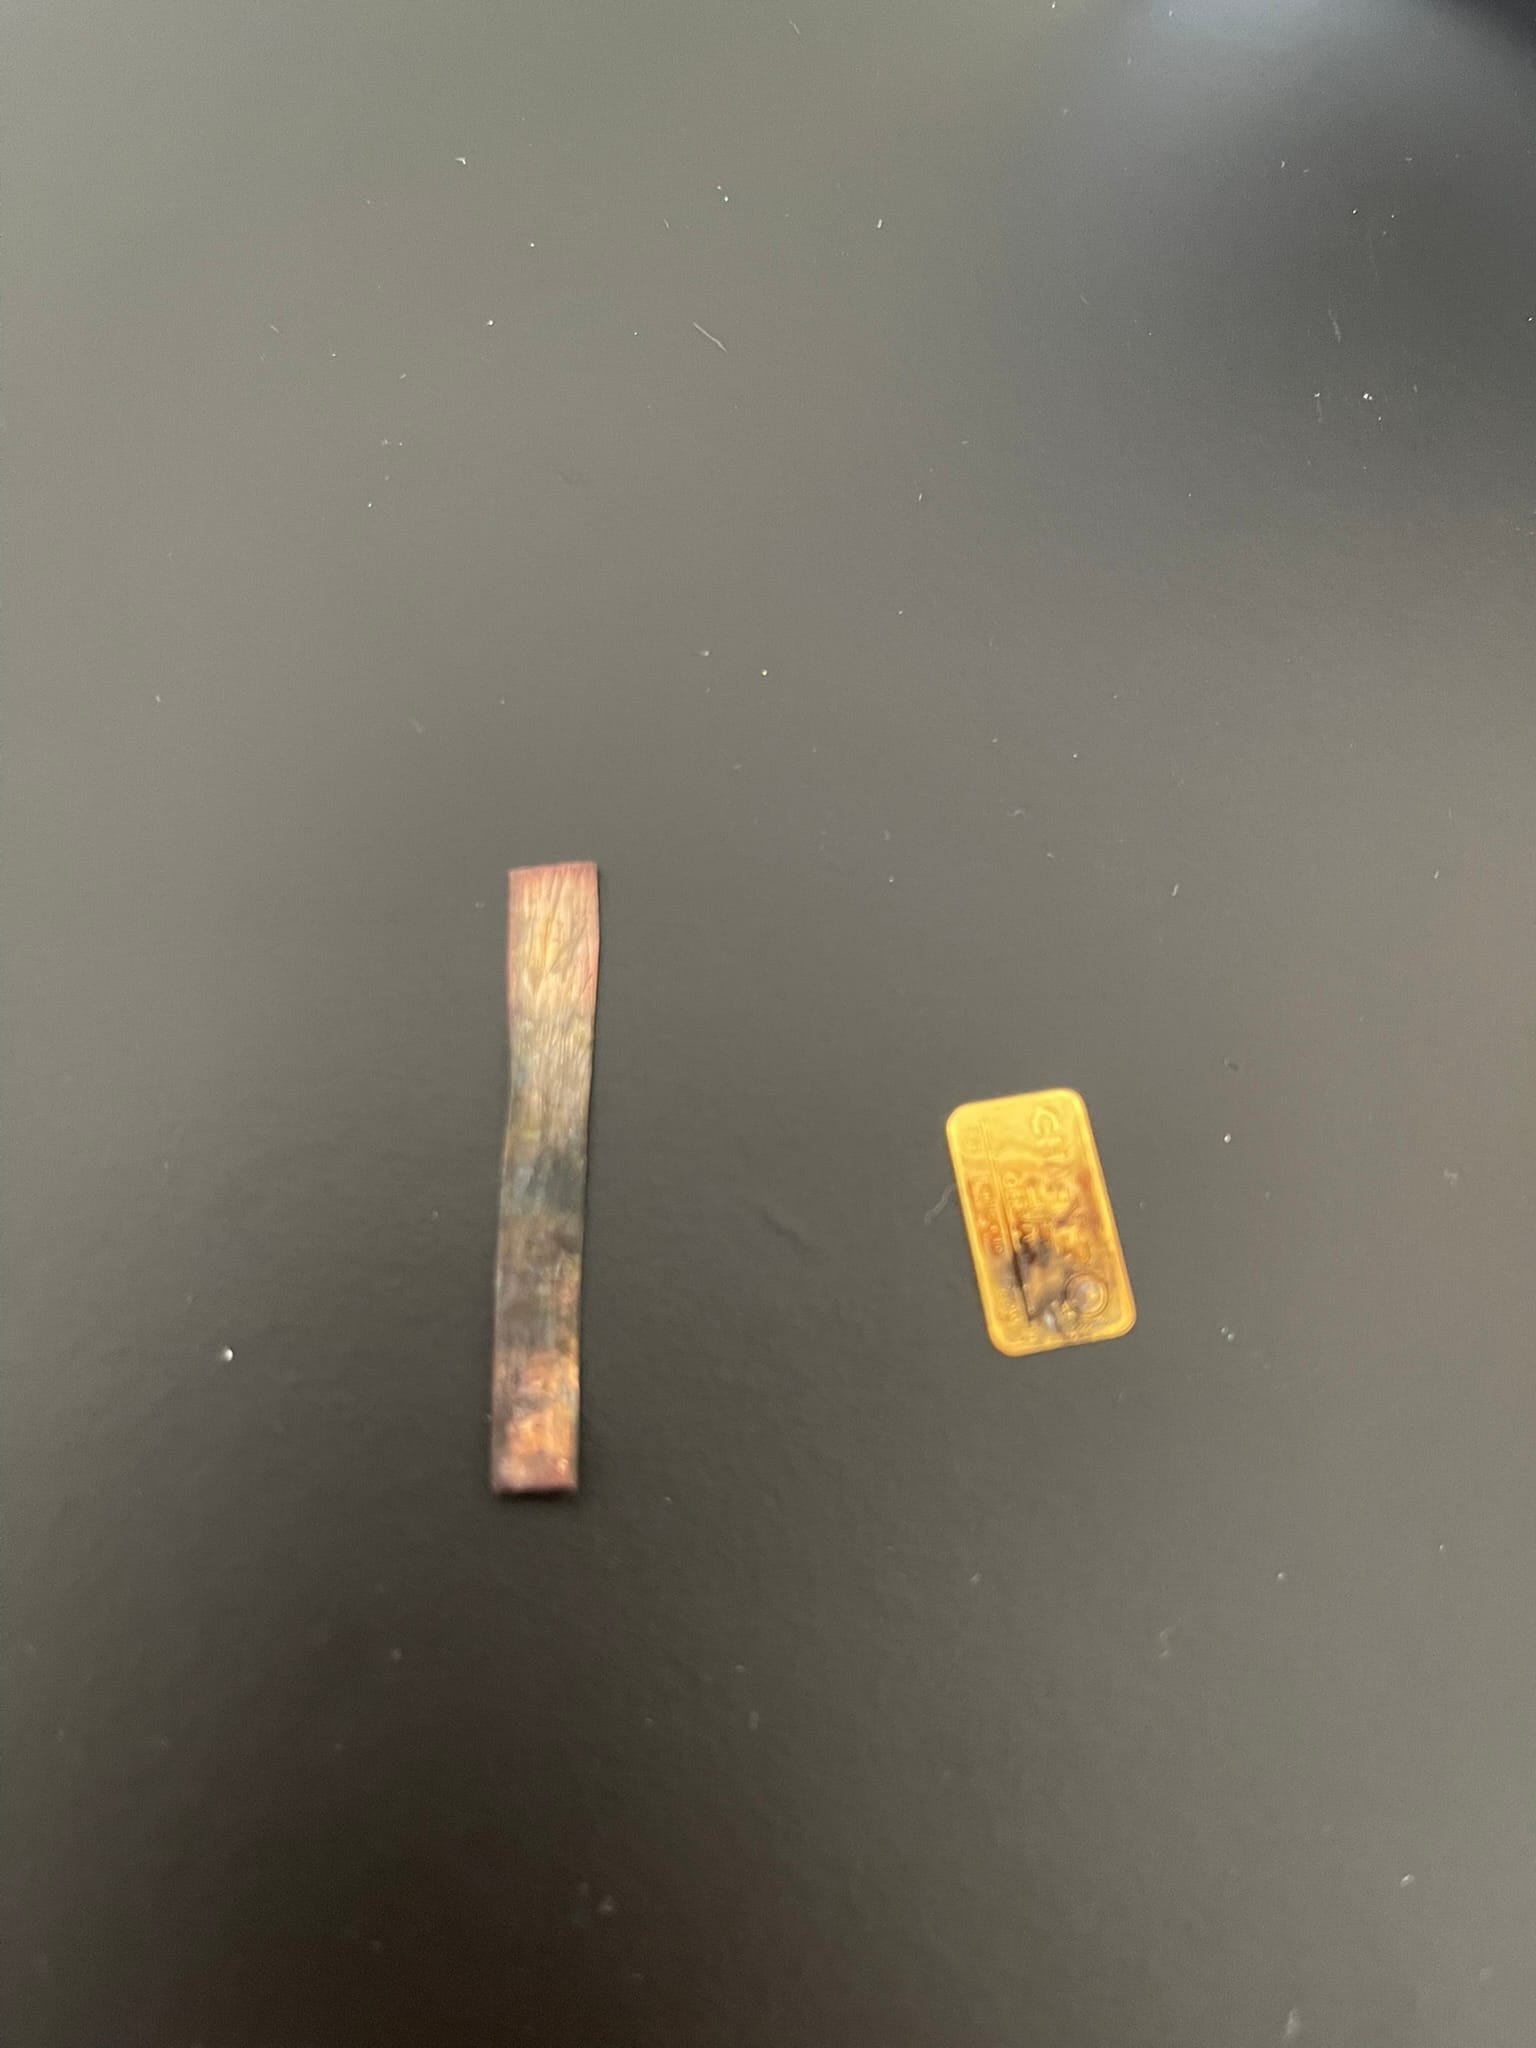
- 100% Pure Copper Rod: Helps reduce costs by limiting the amount of gold needed; more details on this throughout the guide.
Throughout this guide, I'll use the term 'chemical' frequently. By this, I mean any ingredient or compound we're using, but 'chemical' is more grammatically correct.

Time Required
I wish I could give a solid answer, but in order to give you a realistic time frame, you have to consider a few possible variables. So buckle up so you can see what you're getting yourself into:
- How stable you want your product to be: We’ll dive deeper into this later, but essentially, this refers to the shelf life. If you want a longer-lasting product, the process will take more time.
- How small you want your particle sizes to be: Speeding up the process can result in larger colloidal gold particles. For nutritional and natural health benefits, smaller particle sizes are typically preferred.
- How powerful your power supply is: If your power supply isn’t capable of outputting higher voltages, the process will take longer.
- What concentration you’d like your colloidal gold to be (e.g., 10ppm, 20ppm, or higher): It takes longer to achieve a more concentrated colloidal gold.
- The volume of colloidal gold you need (e.g., 250ml, 500ml, etc.): The more you need, the longer the process will take.
Now, you’re probably thinking, “I’m going to be here for days, James… I just want to get this over with.” Well, you’re in luck — I’ve guided plenty of people through this process, and they typically take anywhere from 30 minutes to 3 hours for an average 20ppm, 500ml solution. But as I mentioned earlier, it all depends on your specific requirements.
But don’t worry — no matter how long it takes, you won’t have to babysit the process. Most of the time, it’s just a matter of waiting for the process to finish.
Sourcing Materials
If you're anything like me, when I first wanted to try this process, I didn't have any bits of copper or gold lying around the house. So, you'll need to make sure you source these materials before you get started.
Choosing a Gold Source
Here's the fun part — but unfortunately, probably the most expensive part too. Actually getting your hands on some pure gold! When it comes to doing just that, you have a few options to choose from.
Old Jewellery
If your lucky enough to have any old jewellery lying around, you've may have just saved yourself an expense! Just make sure that it's made from 24 Ct (24 K) gold.
"James, this jewellery is years old — how the heck would I know what it's made from? Maybe it's just gold-plated?" Luckily (and not so luckily), you can buy gold testing kits online, but unfortunately, the cheapest ones I could find were in the range of £30 ($38). You may be able to find one cheaper, but it's vital you only use 24c (24k) 100% pure gold for this process. It will not be safe to do it with any other quality, as you may be introducing unknown contaminants into the solution.
A genius idea, which I've personally never tried, is to take your jewellery to a jeweller or pawn shop and ask them to test it for you, as if you were looking to sell it. They will then perform the test and tell you the purity.
1g Gold Bar
If you don't have any old jewellery 😢, and don't mind paying a bit more upfront to save money long term, a 1g gold bar is the next best cost-effective option, especially if you plan to use this process over the next few years.
Each of my own batches typically takes around 10-11mg of my gold bar per 500ml, 20ppm batch. This lasts me about 1 month, meaning my 1g gold bar will last me 8 years! Given that the initial cost of the bar was only £75 (95$) at the time of writing, it's only costing me around £1.28 (1.5$) per month.
To find your very own 1 gold bar, Google is your friend. However, make sure to shop around and check delivery costs, as these can significantly affect the price.
Gold Leaf
This is the cheapest way to get ahold of gold, but it comes with the downside of not being cost-effective long term. The smallest amount of gold leaf I could find online in the UK is 5 sheets of 80 x 80mm 24ct gold (16g specification) for £12 (15$). Although it's not very expensive, this only equals around 80mg of elemental gold. This will get your foot in the door, but you'll end up paying more than you should for such a small amount of gold.
The key takeaway here is that you should spend as little as possible, while ensuring you have enough gold leaf to fold into a wire for use later in this guide.
Gold Wire
This is the most expensive option 🫣, but it also turns out to be the most practical too. Gold wire is very easy to work with, and if you decide to go with this route, there are a couple of things to keep in mind:
- Fully Annealed: You may come across this term, which means that the gold wire has been heated to extreme temperatures and then cooled. Doing this makes the metal more malleable (bendy), and while it doesn't affect the quality or purity of the gold, it makes it easier for jewellers to work with.
- Coating: Some gold wire may come with a coating, depending on the supplier. While gold typically doesn't oxidise like other metals (it doesn't react with air), it's still important to ensure that the gold wire you purchase is free of any coating.
- Wire Size: Avoid wire that's too thin; make sure it's at least 1mm thick. Additionally, ensure the wire is long enough — I recommend a minimum of 3cm, though 5cm or more ideal.
How Much Gold Do You Actually Need?
The exact amount isn't crucial, what's important is that you can attach the positive side of your power supply to the gold and submerge the other end in water.
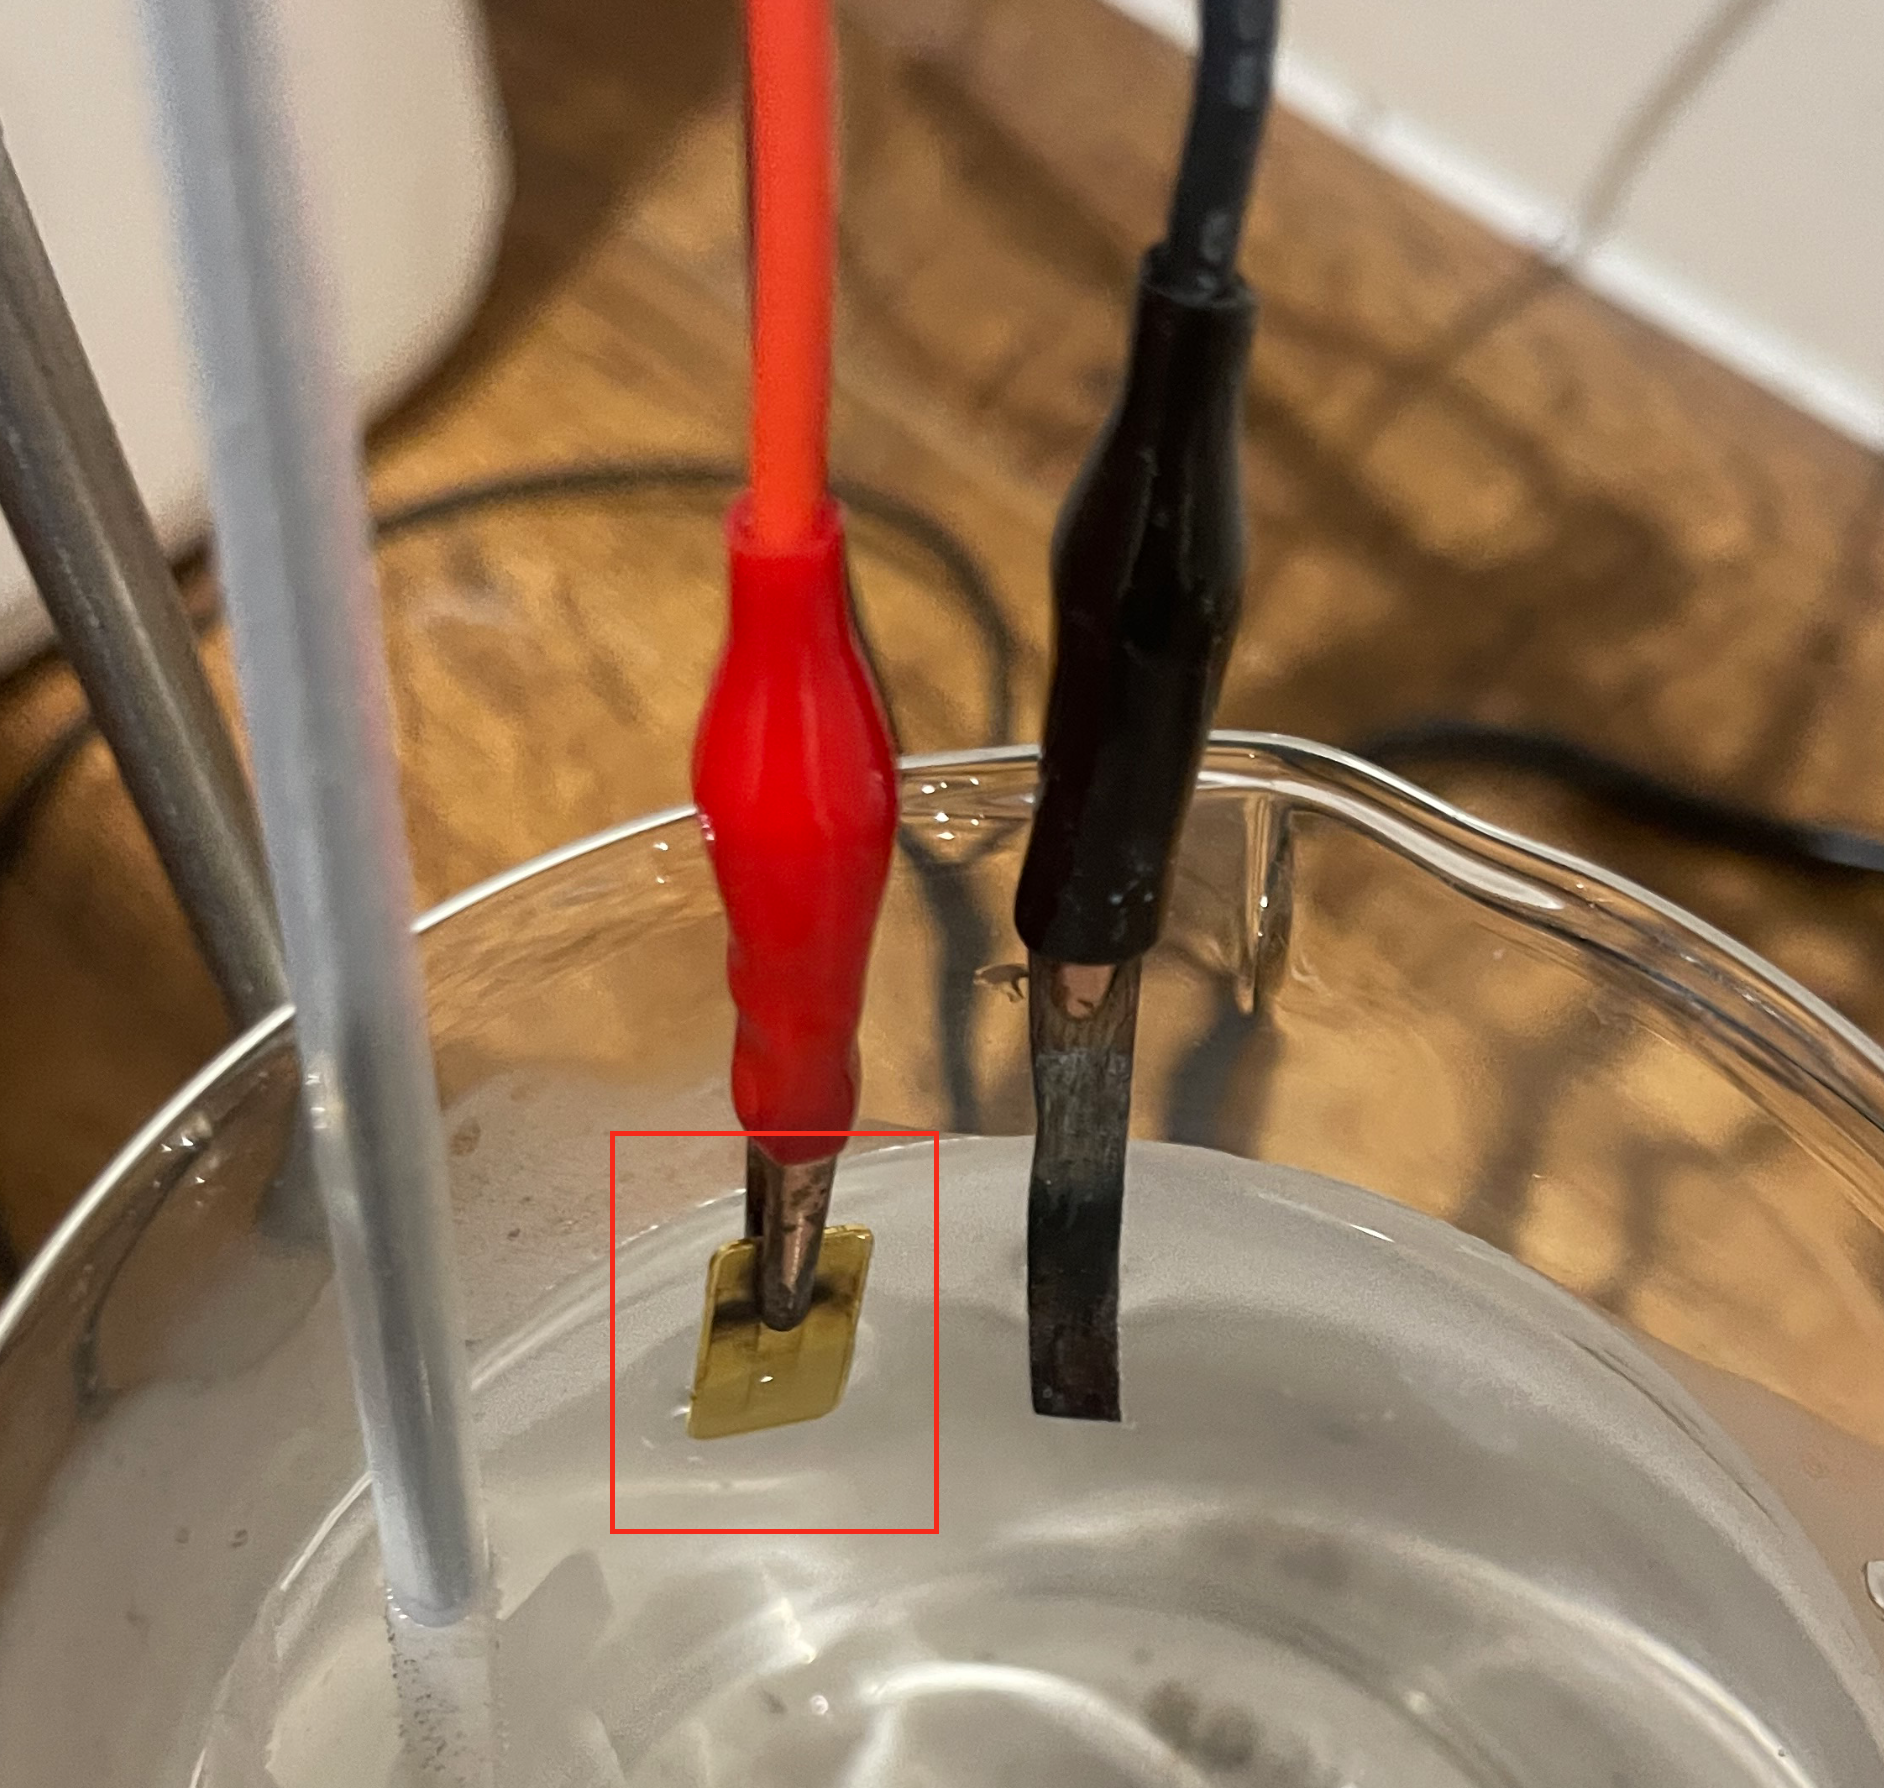
In the image above, you can see that I have a crocodile clip on one side, while the other side of my gold bar is submerged in water. Depending on your materials, you may be using gold leaf, gold wire, or old jewellery. If you're using gold leaf, you'll need to fold the sheets into a compact wire, ensuring it isn't too fragile, as this could cause the gold to flake off midway through the process.
The surface area of your gold doesn't matter much, although it can affect the time it takes for the process to finish. The more surface area there is, the quicker the process will be, as it allows for more contact with the water, facilitating the release of gold ions.
Depending on the amount of gold you have available, you may prefer to use another piece of gold on the negative side of your power supply instead of copper. In the image above, you can see I'm using copper, but thee are several other materials you can use, which I'll go into more detail about later in the process. Just know that if you prefer, you can use more gold on the negative side and save yourself the trouble of sourcing copper.
Choosing A Copper Source
Now that you've got your gold source sorted, it's time to find a piece of copper. Luckily, copper is relatively cheap — or even free — if you have a few items lying around the house.
Let's dive into the options.
Electric Wire
By far, the easiest — and free — way to get copper is by stripping old electrical wire you have lying around. Simply remove the plastic coating, and you'll be left with bare metal.
Copper Pipes
If you have an old copper pipe, you can cut it into strips. Remember the image I shared in the gold section? I used a copper strip in that.
Old Electronics
Almost all electronic devices contain some copper. However, be careful when dismantling high-voltage equipment — devices like microwaves can be extremely dangerous!
Copper Sheets or Strips
If you're reading this section, it means you've exhausted your free options — unfortunately, it's time to spend some cash. The most common place to find copper sheets and strips are online, at hardware/DIY stores, or in craft supply shops.
To remove the coating, I use the burn-and-scrub method. First, hold a flame to the metal (be careful — watch your hands!) until it turns black. Then, use sandpaper or a metal brush to scrub the surface. This ensures that all of the coating is completely removed. If you don’t remove the coating, the copper won’t conduct electricity, which is essential for this process.
Other Materials
Earlier, I mentioned that instead of using copper on the negative wire, you can also use other materials. In most cases, you probably won’t care about using an alternative since they tend to be more expensive. However, if you happen to have any of these lying around, this section is for you:
- Platinum (Best option — won't contaminate your solution)
- Carbon Rods
- Silver
- Stainless Steel
If you do choose an alternative, platinum is the only one I fully recommend, as it won’t contaminate your solution at all. The other materials carry some risk of introducing impurities. When in doubt, just stick with copper.
A Little Bit Of Science
Before we dive into the process, it makes sense to first go over a bit of the science behind what we’re doing. Understanding the chemistry will help you make more informed choices throughout the steps below. Plus, you’ll be able to impress your friends with all the new chemistry knowledge you’ve picked up!
Electrolysis
You’ve probably heard of electrolysis before, but to put it simply, it’s the process of passing an electric current through water using a positive (anode) and negative (cathode) charge. In this case, we’re using electrolysis to break down pure 24K gold, turning it into gold ions (Au³⁺ or Au⁺) that dissolve into water.
Reduction (Reducing)
Once your gold ions are suspended in water, the next step is reduction. This process converts gold ions into solid gold nanoparticles (Au⁰), which are responsible for colloidal gold’s characteristic ruby-red colour.
To achieve this, you’ll need a reducing agent. A reducing agent is a substance that donates electrons to the gold ions, converting them into solid gold nanoparticles. In this guide, the reducing agents I discuss include sugar based ones corn syrup, glucose/dextrose, and table sugar as well as Tri-Sodium Citrate Dihydrate (Sodium Citrate)
Think of it like turning saltwater into solid salt crystals — except, rather than evaporating water, you’ll be using a chemical reaction to transform dissolved gold (gold ions) into solid gold nanoparticles, which form your colloidal gold.
Aggregation (Aggregate)
Here’s where things get a little more complex — once your gold nanoparticles form, they don’t always stay that way. Unfortunately, they naturally tend to stick together, a process known as aggregation.
When your gold nanoparticles remain separate, the solution maintains its beautiful ruby red or pink colour (depending on concentration). However, as the particles begin to clump together, the solution may turn purple or blue. If this aggregation continues too much, you may notice black clumps or precipitation, which means the gold nanoparticles are falling out of the solution because they’ve become too heavy to stay suspended.
There are a few methods to prevent this from happening, which I’ll cover in more detail below. But now that you have a better understanding of the science behind the process, let’s dive right in!
First Step, Getting Started!
It’s finally time! You’ve got all your equipment ready, your shiny piece of gold staring back at you, and maybe even a beautifully crafted copper rod. But how do you turn all this into the ruby-red liquid you’re after?
If you’re fortunate enough to have a milligram scale, start by weighing your gold piece. This step is important because it allows you to accurately determine the concentration of your final colloidal gold solution and monitor how much gold is used during the process. Knowing this will also help you estimate how long your gold supply will last.
For example, in one of my previous batches, I started with 0.978g of gold. By the end, it weighed 0.969g, meaning I used 9mg of gold. From this, I calculated that my final solution had a concentration of around 18-20 PPM.
If you don’t have a milligram scale, don’t worry — you can still proceed! You just won’t know the exact concentration and will need to rely on colour as an indicator that you’ve reached the right strength.
Setting Up Your Electrolysis Setup
First let's set up your equipment. You'll need your power supply, glass container, and a heat source to get started. Make sure your glass container is sterilised before use. Wash it thoroughly with soapy water, and for extra precaution, boil it for a few minutes to eliminate any risk of contamination.
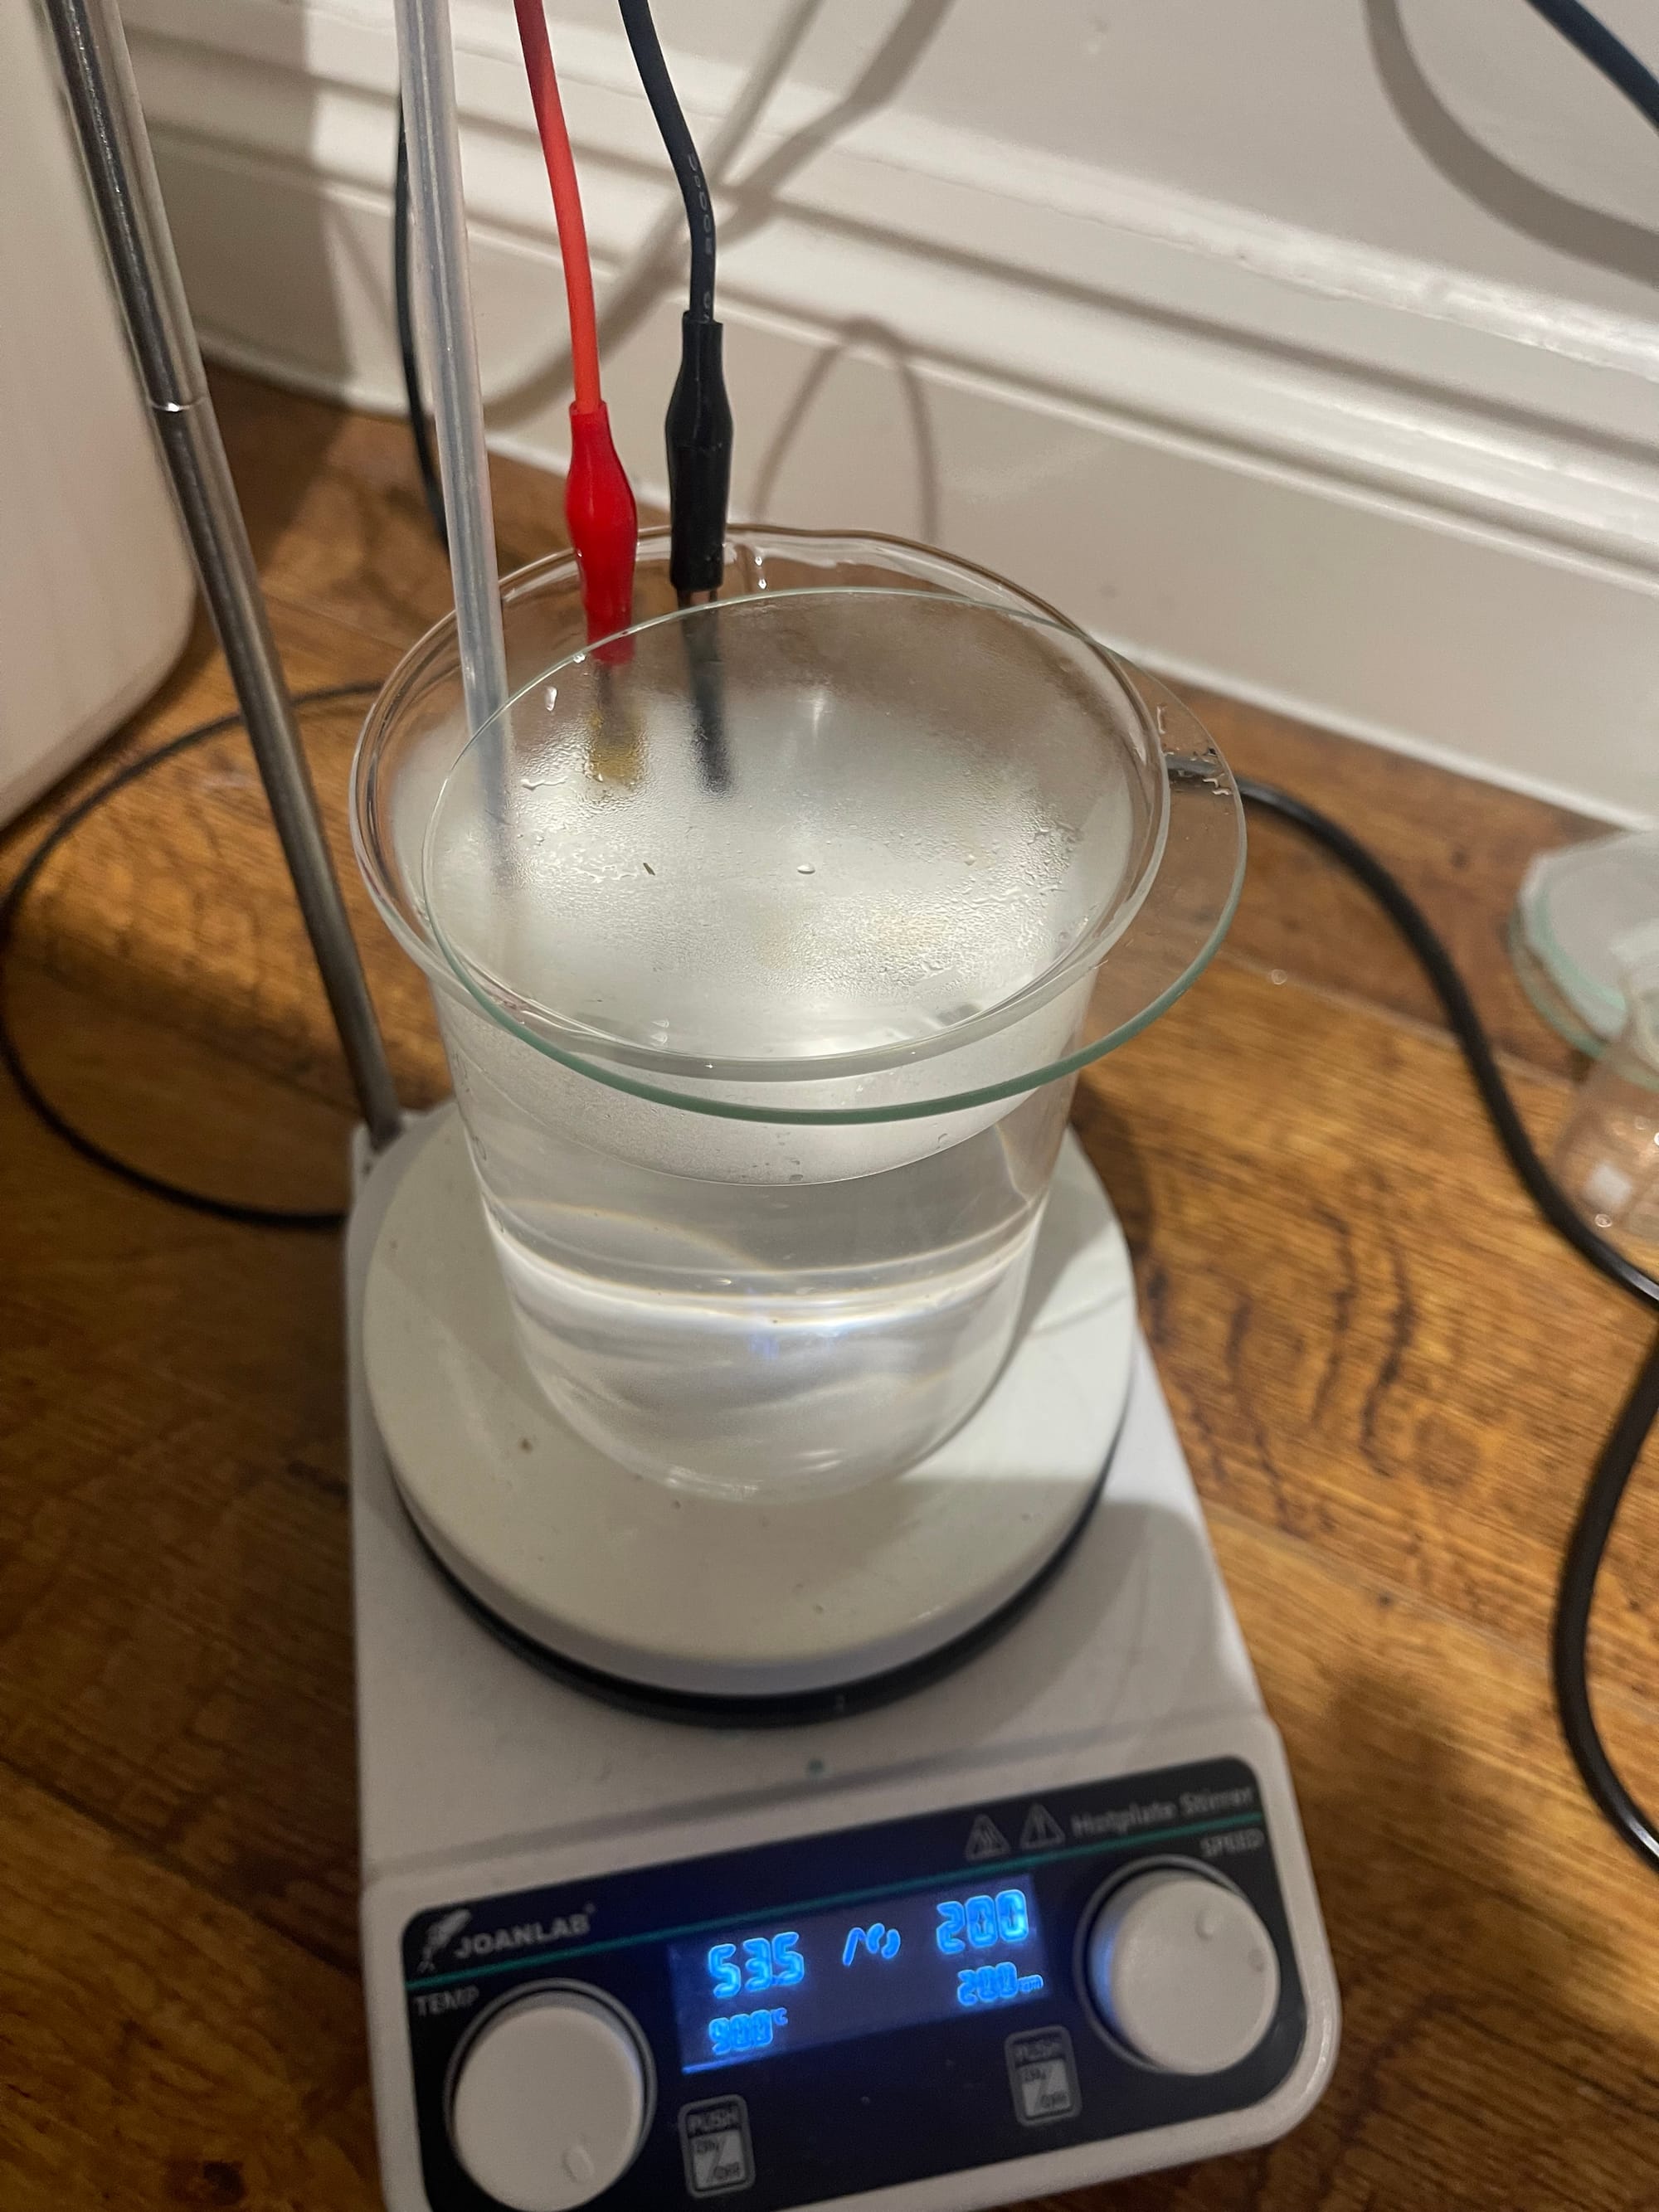
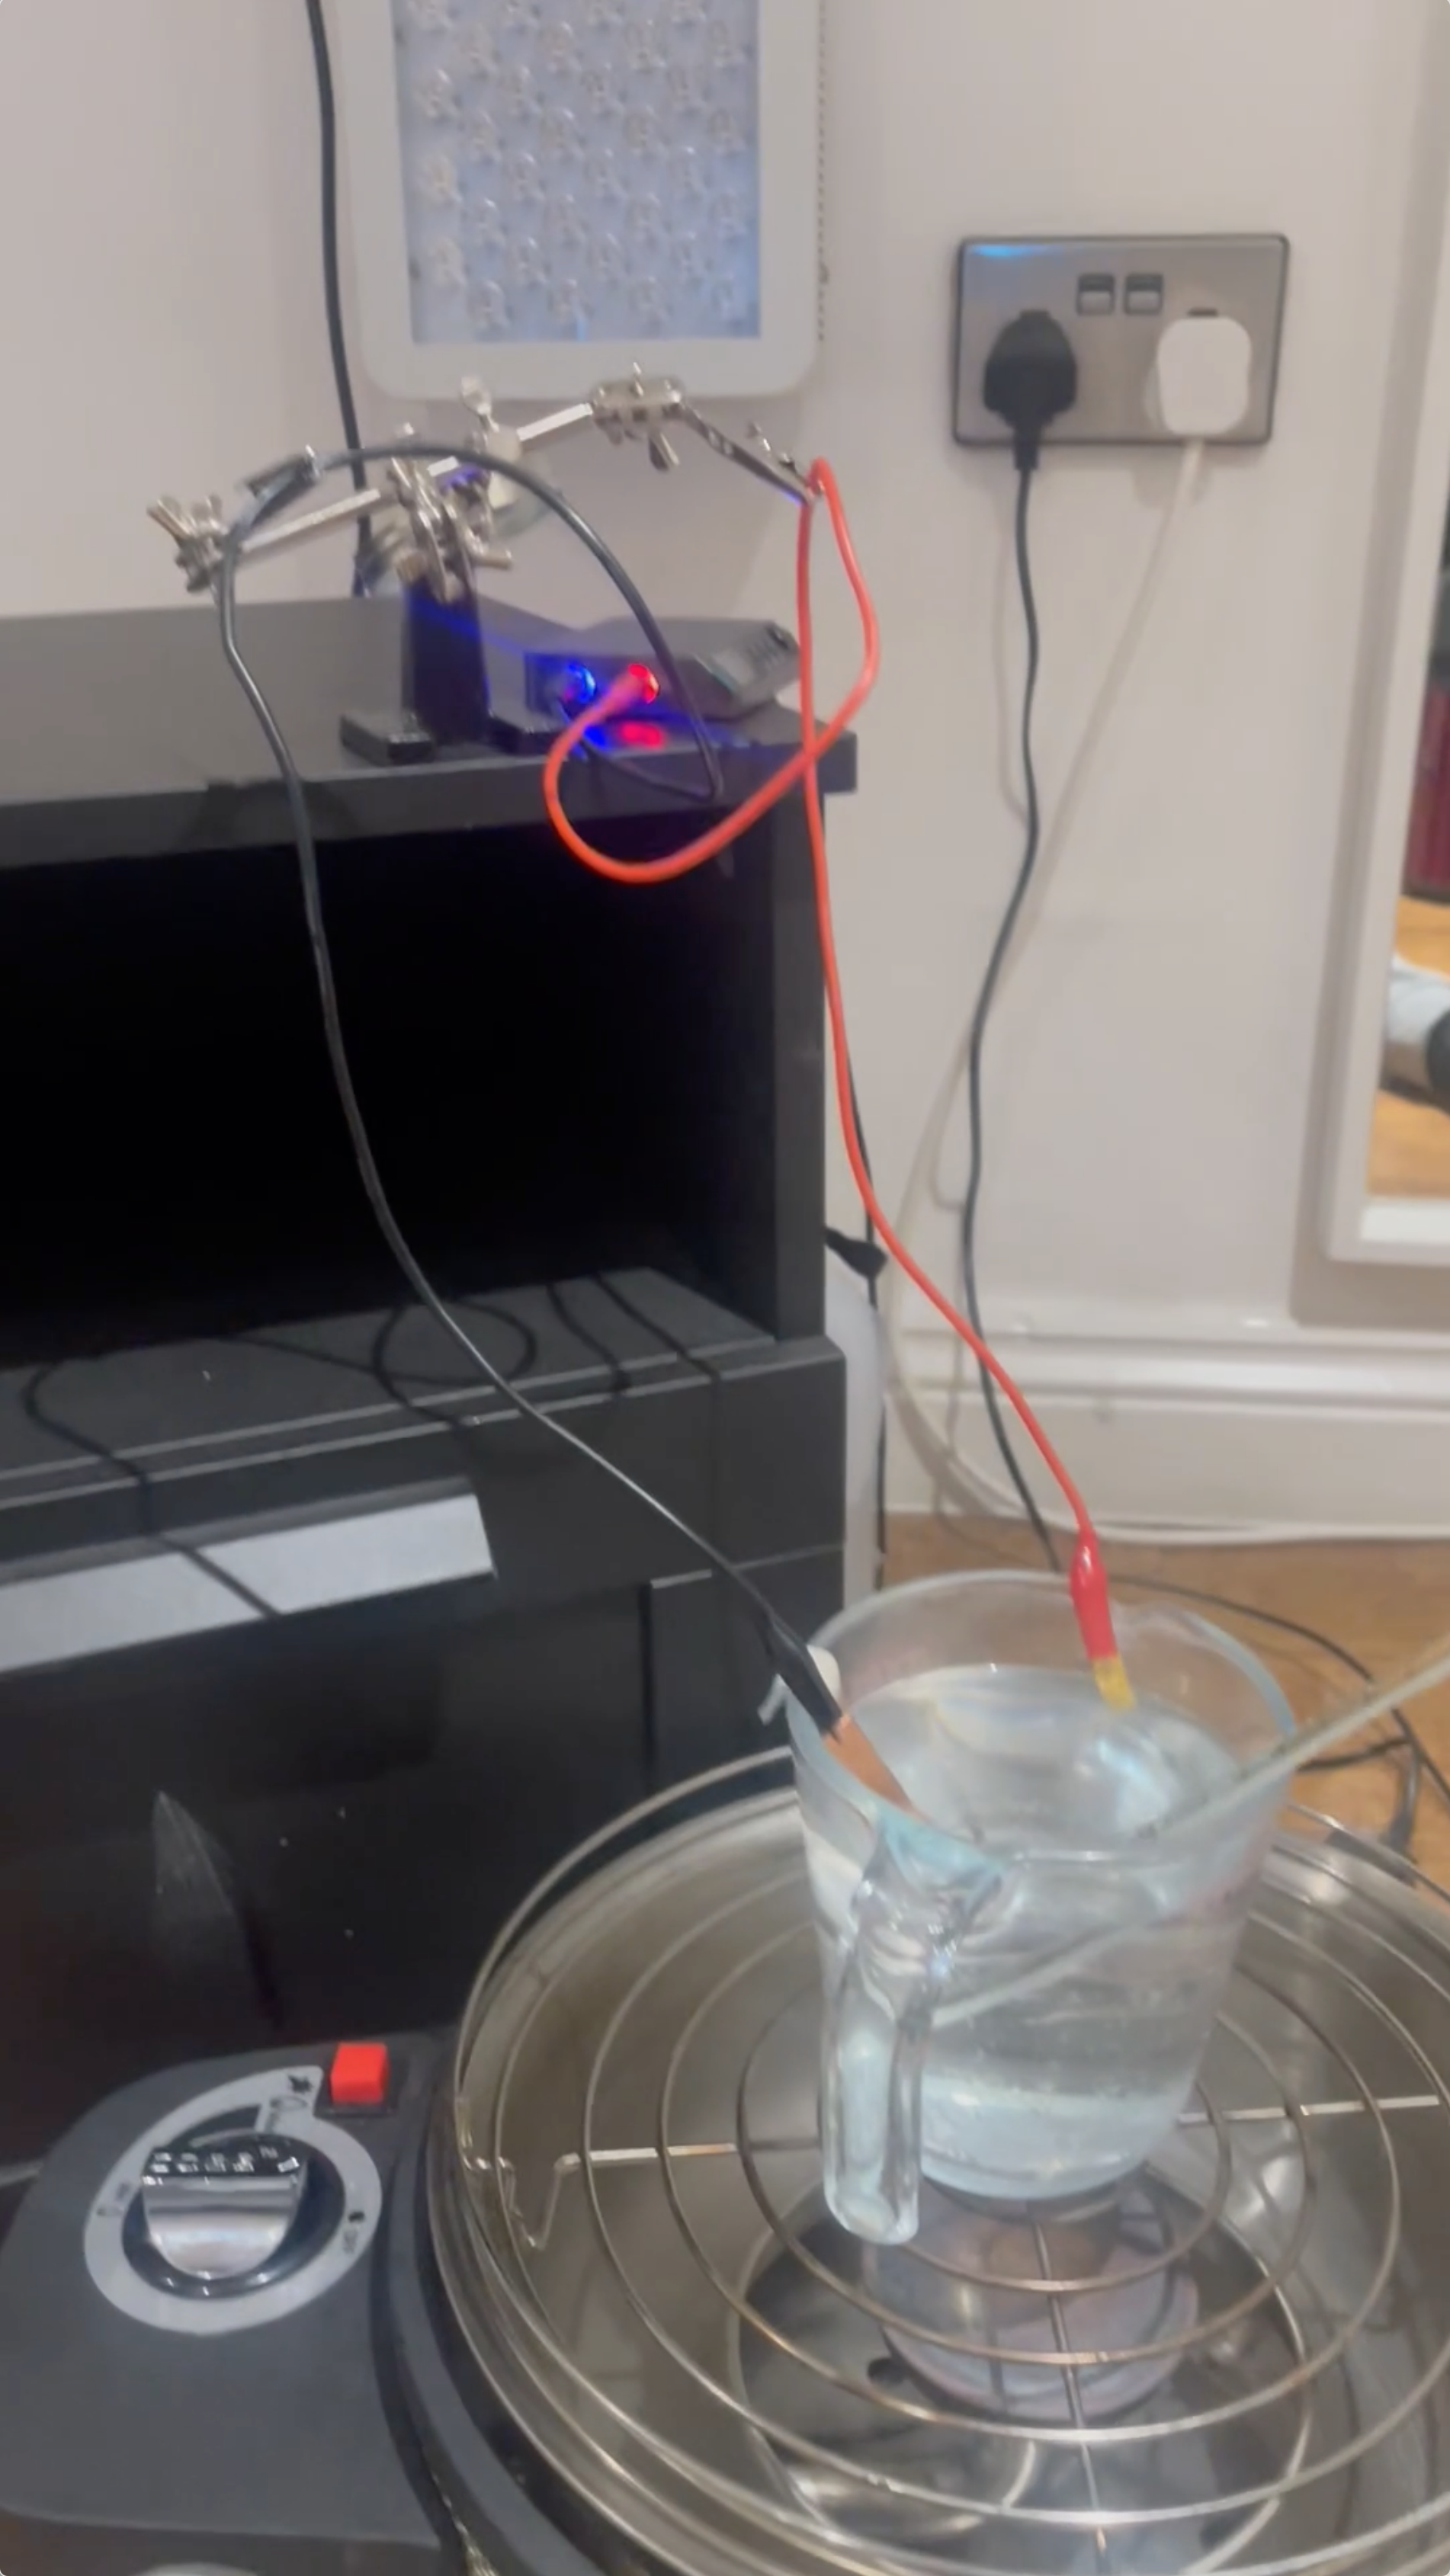
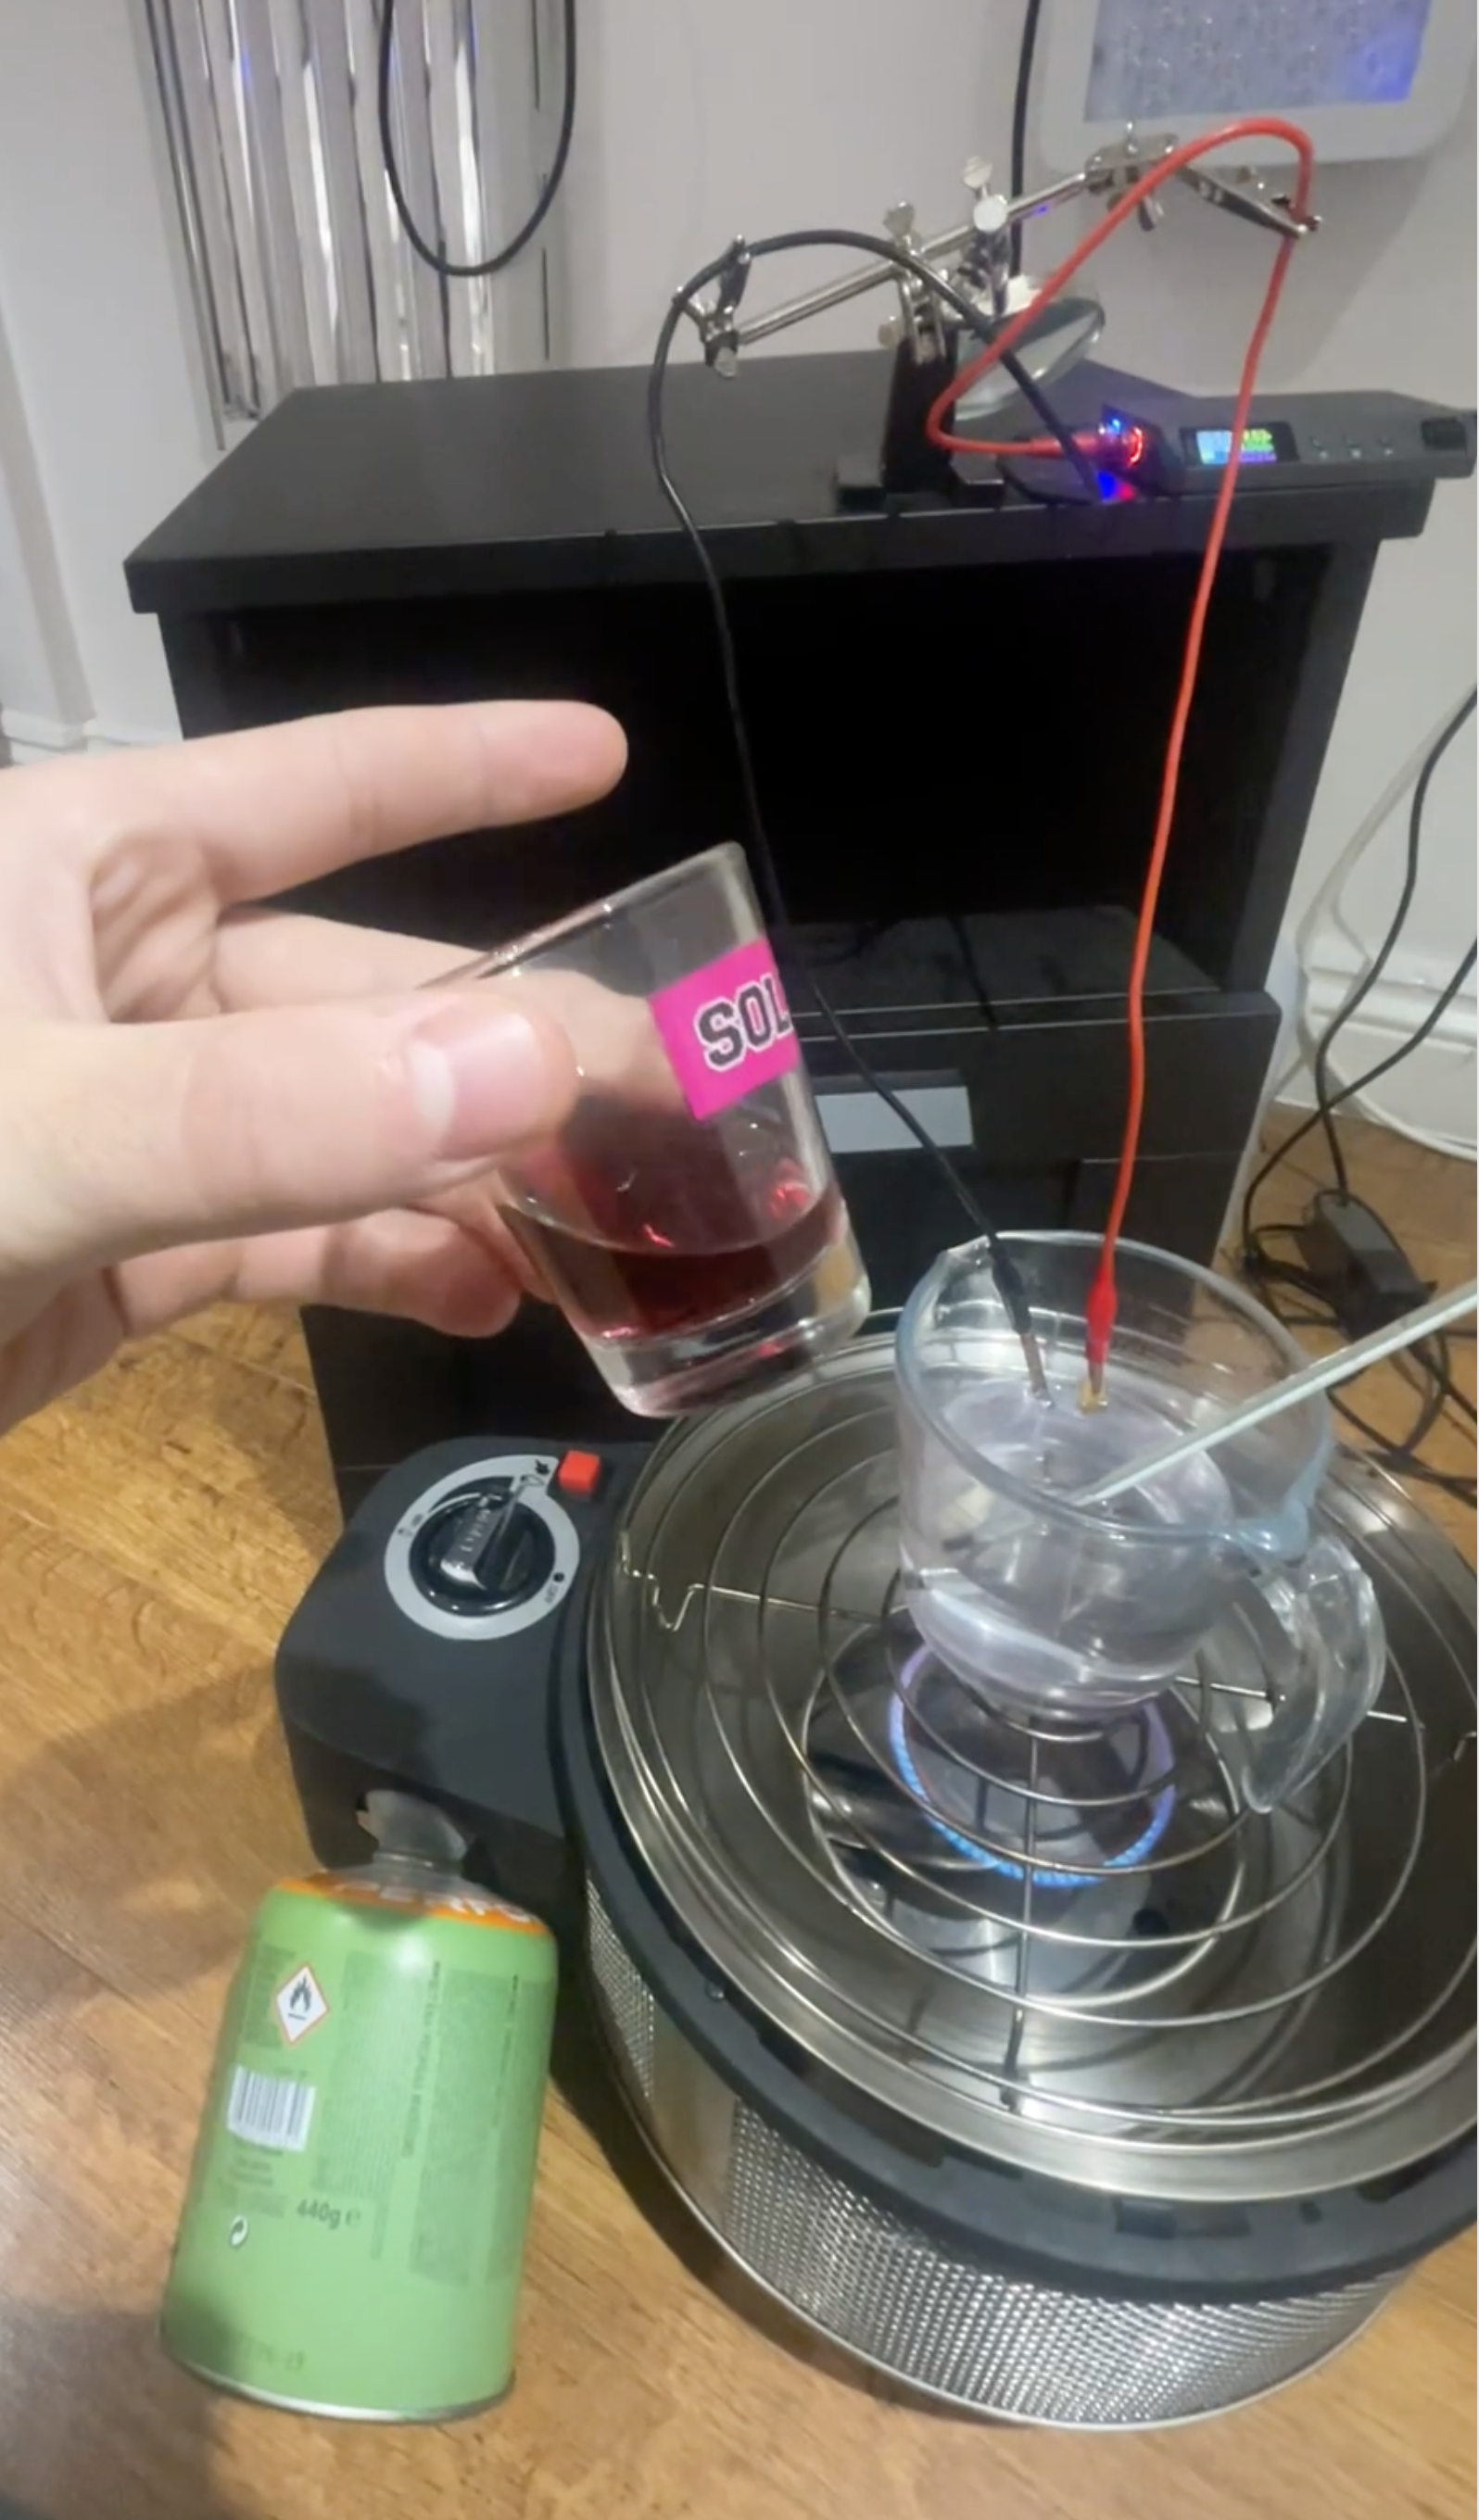
You’ll want to set up your equipment like in the images above. Most importantly, place your glass container on top of your heat source and find a way to suspend your power supply wires over the container.
At this stage, don’t worry about the exact wire positions, which metals attach to which clip, or adding distilled water — that comes later. What matters now is securing your wires at the right height and keeping them stable. I used an old electronics tool called a helping hand, which let me easily adjust the position. If you don’t have something like that, clothes pegs or clamps will work just fine.
Funny enough, the image on the right (with the gas stove) was from my very first attempt at this process. My setup looked like something out of a dodgy neighbour’s garage — I was using an old camping stove I found in storage because I didn’t have a hot plate, and my girlfriend would’ve killed me if I used the kitchen cooker.
Since then, I’ve upgraded to a chemistry hot plate with a built-in stirrer and temperature probe. That’s definitely overkill for your first time, but it’s something to consider down the line if you want to refine your process.
At this point, your electrolysis setup is ready to go!
Which Method Will You Use?
If you’ve gone through the science behind this process, you’ll know that two key factors come into play: Reduction and Aggregation. The way these processes unfold depends on the method you choose, as different variables affect the outcome.
There are two main methods you can use, and the right choice depends on your requirements and available time.
- Using Salt (Sodium Chloride), a sugar based reducing agent such as Corn Syrup, Dextrose/Glucose, or Table Sugar, along with Tri-Sodium Citrate Dihydrate (Sodium Citrate).
- Using Salt (Sodium Chloride), and Tri-Sodium Citrate Dihydrate (Sodium Citrate) only
Each method has its own advantages, which I’ll break down so you can decide which one best fits your needs. Let’s dive in!
Choosing A Method
There are plenty of ways to make Colloidal Gold, but what I’m giving you today is the working man’s method — no fancy lab equipment or lasers needed. This is the 80/20 approach, giving you the best results with minimal effort.

The image above compares the characteristics of Method 1 and Method 2. Now, before you jump to the conclusion that Tri-Sodium Citrate Dihydrate (Sodium Citrate) is the best option — since it offers more stability, smaller particles, and no risk of microbial contamination — there’s a catch.
The downside? It takes significantly longer — we’re talking 2 to 3 times longer. This is because, without a glucose source providing extra reducing power, the conversion of gold ions happens at a much slower rate.
Bacteria Risk Using Glucose Based Reducer
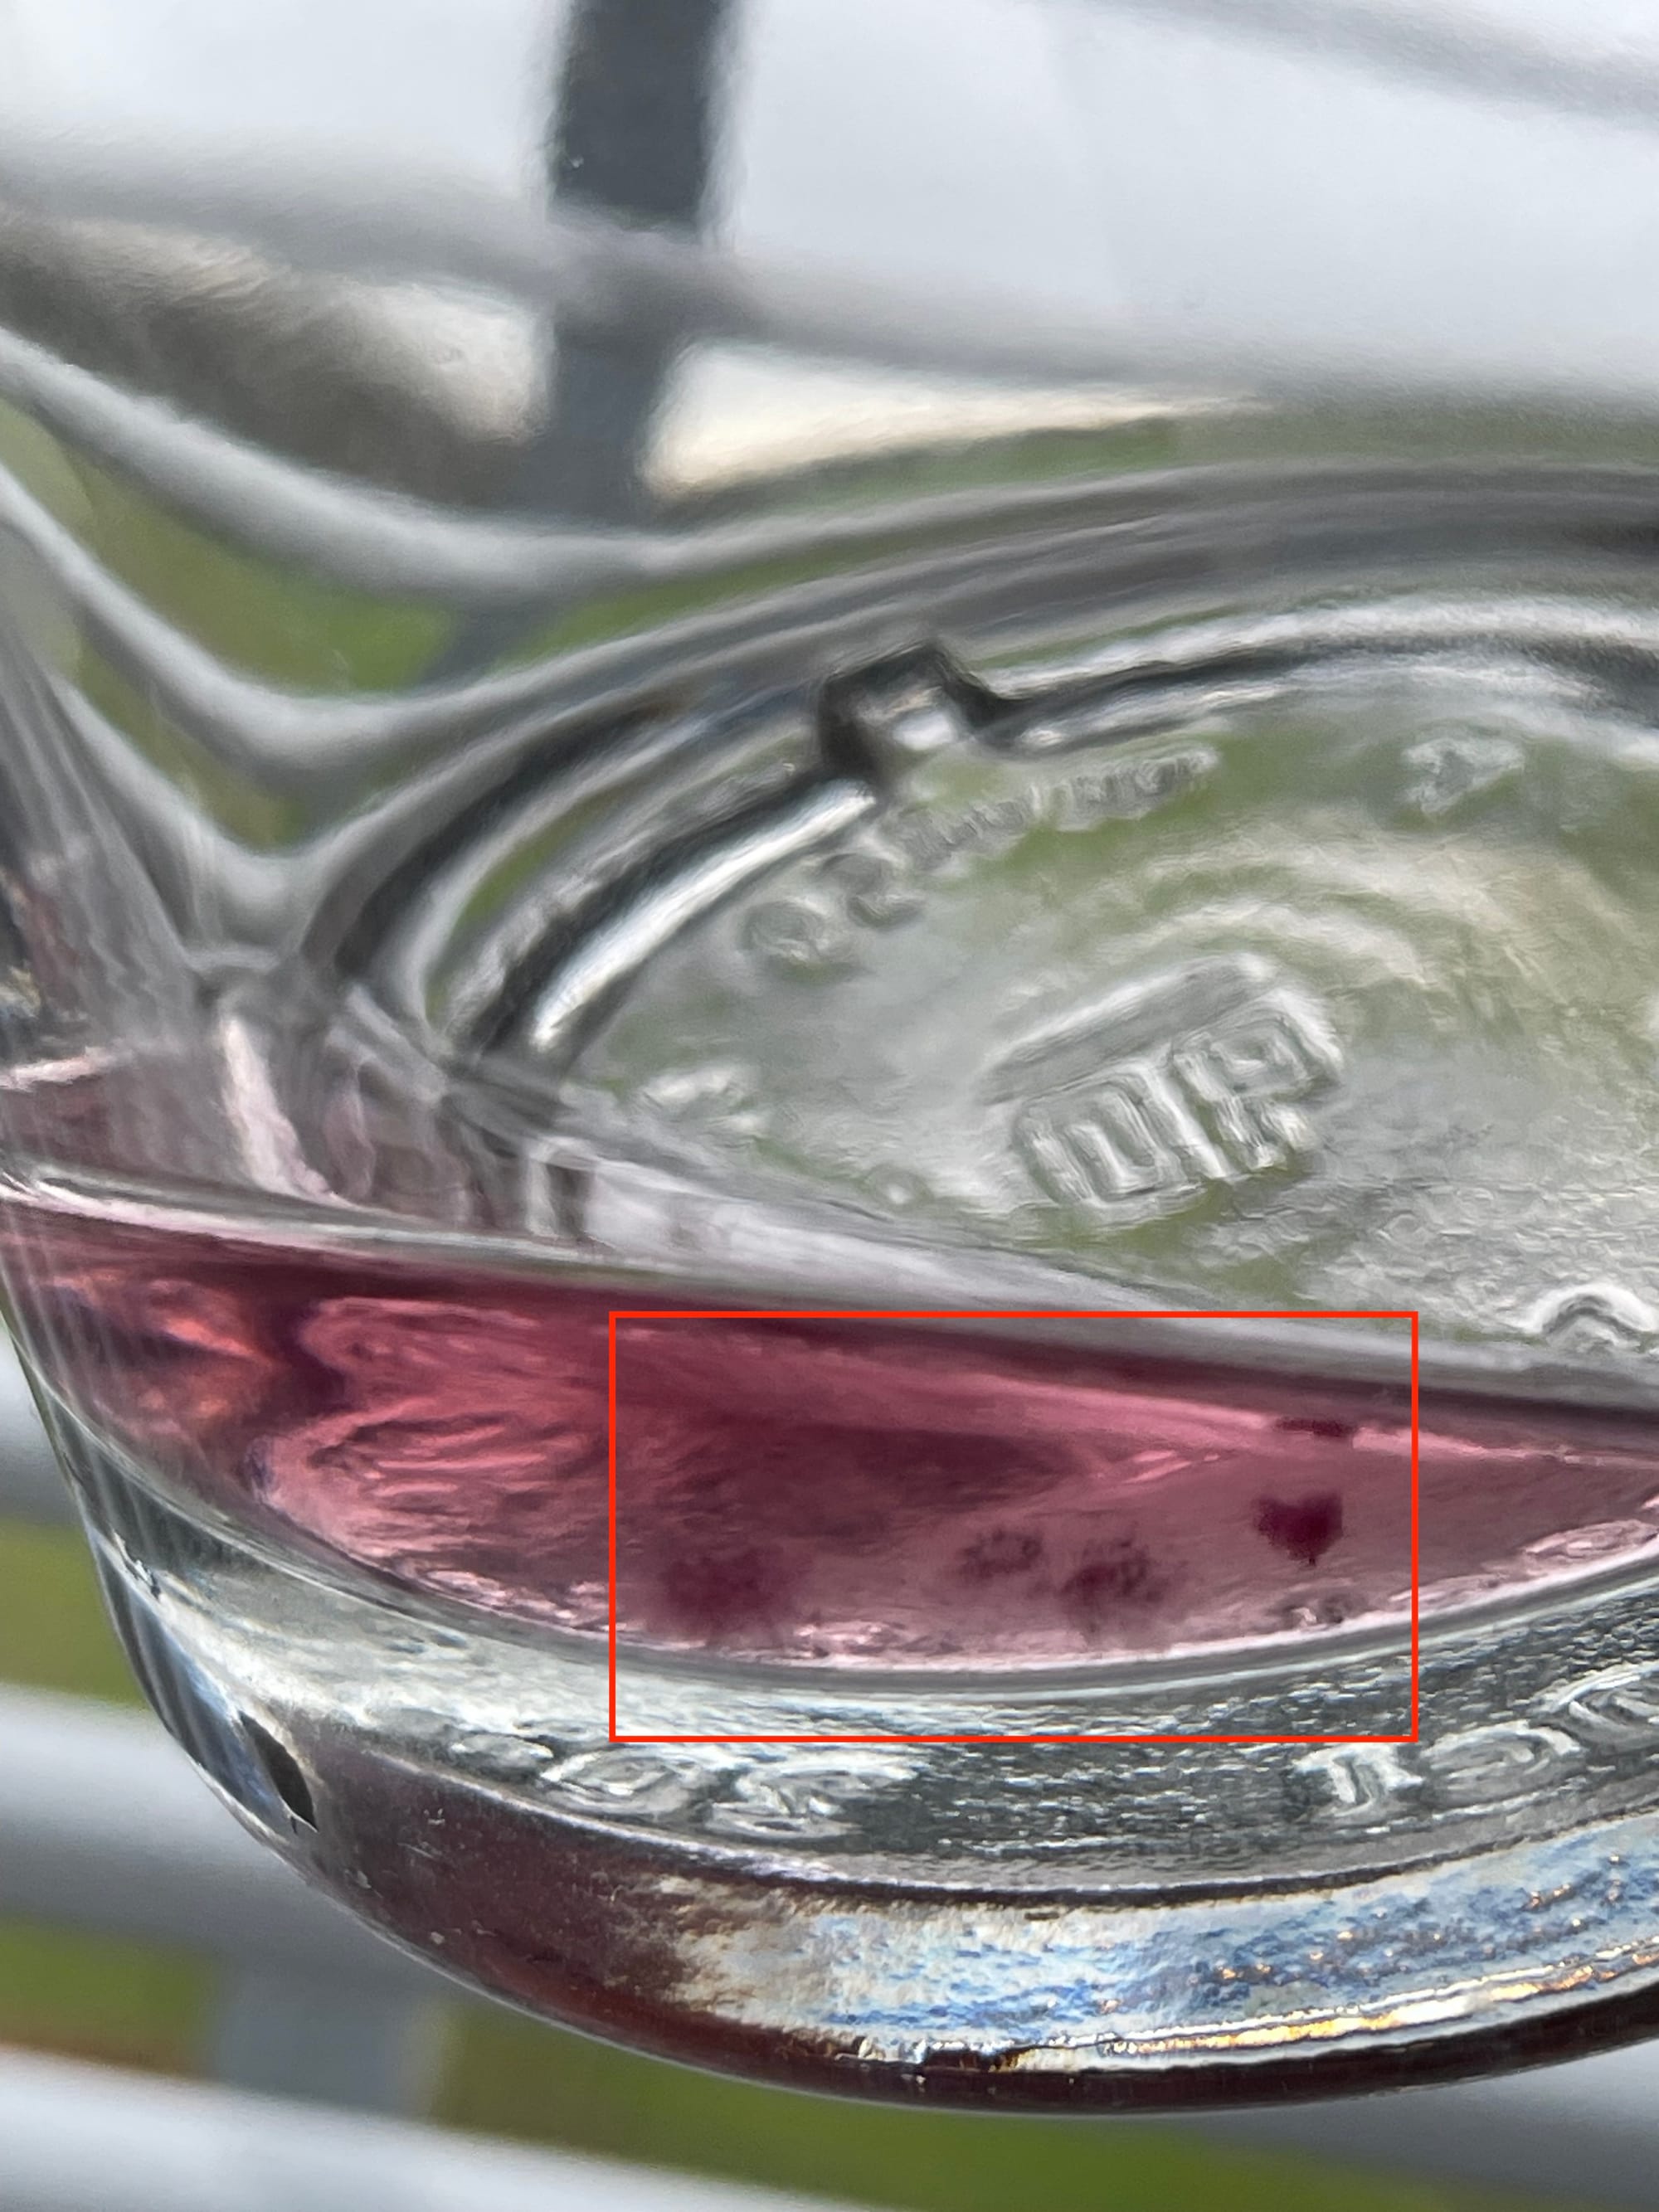
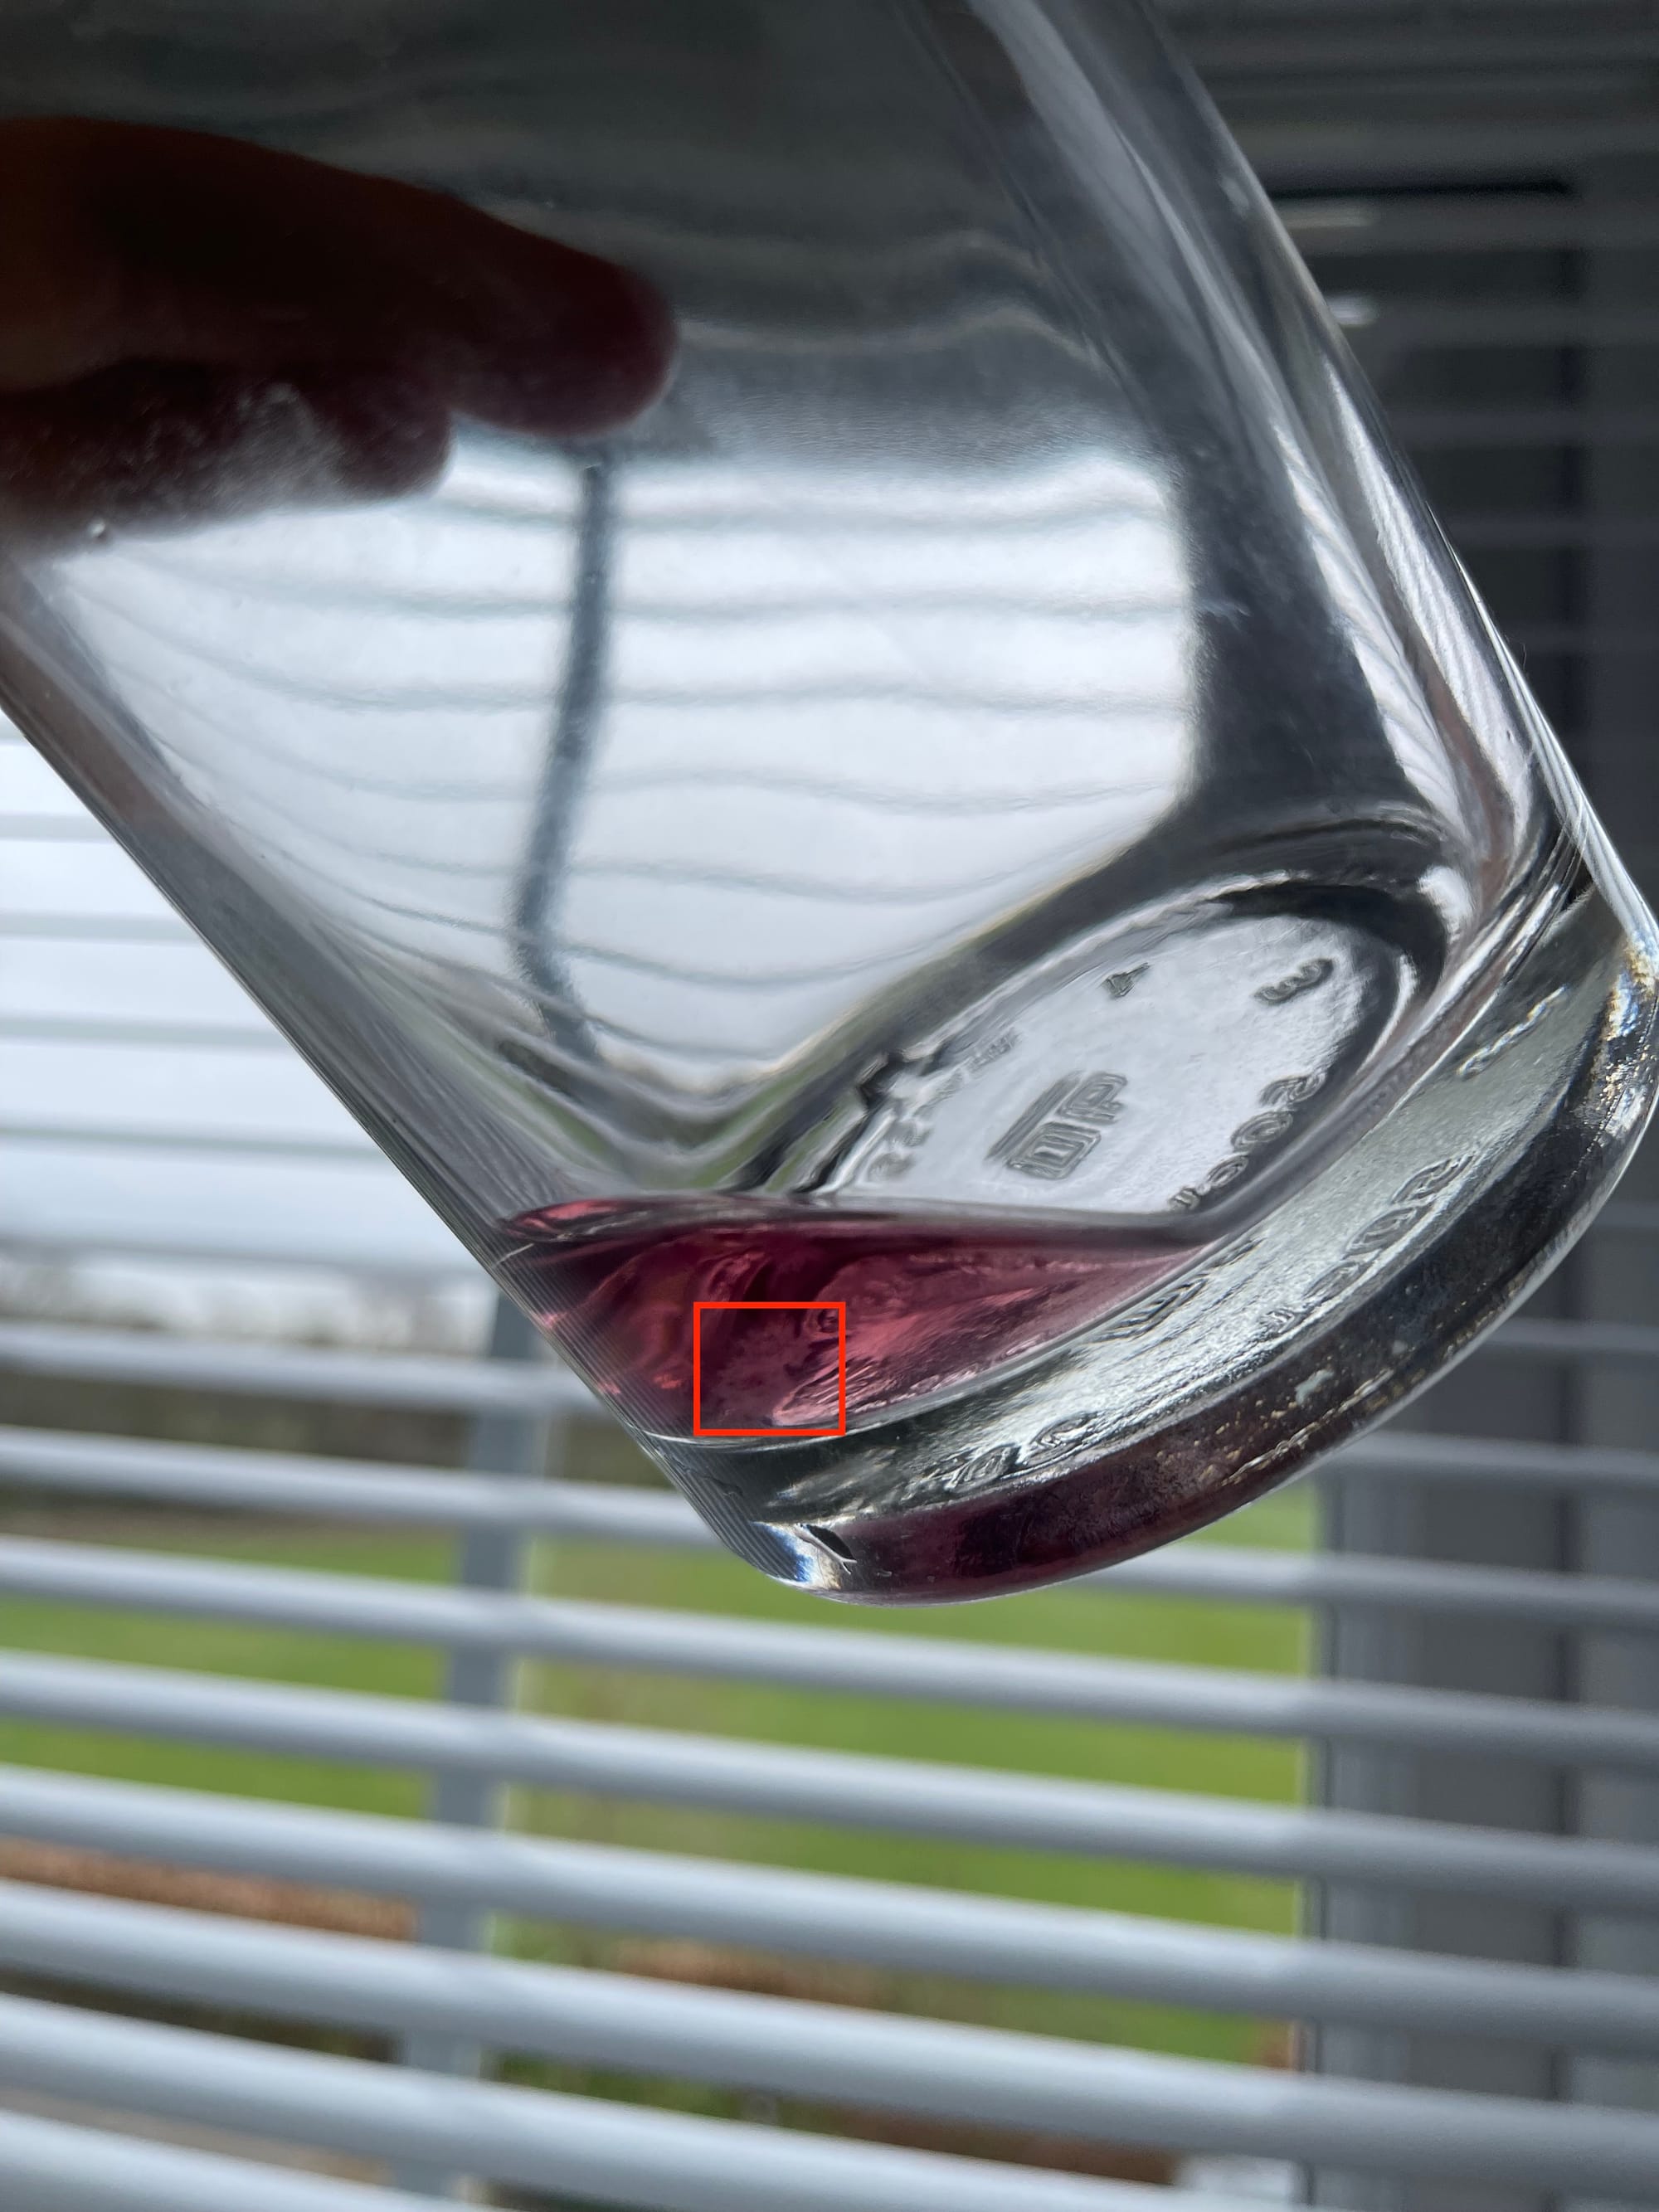
A quick warning when using glucose-based reducers: If your equipment isn’t sterile or bacteria get in when you open the bottle, tiny bacterial colonies can form. This happens because glucose is a sugar, and bacteria love feeding on sugar.
But don’t worry — your equipment is sterile… right? 👀
Jokes aside, if this does happen, don’t panic. It likely means:
- There was leftover sugar in your colloidal gold that wasn’t fully used up in the reaction — try using slightly less next time.
- Your equipment wasn’t fully sterile — boil your glass bottles and containers and wash them thoroughly with soapy water before using them.
The images below show what happened to me after leaving a bottle for a few months!
Method 1 Setup
Ingredients: Salt (Sodium Chloride), Glucose Based Reducer and Tri-Sodium Citrate Dihydrate (Sodium Citrate).
You will need to calculate the amount of each ingredient you are going to use based on the following formula:
- Tri-Sodium Citrate Dihydrate (Sodium Citrate): 0.000294 (g) * batch size
- Salt (Sodium Chloride): 0.00024 (g) * batch size
- Glucose Based Reducer:
- Corn Syrup: 0.00048 (ml) * batch size
- Dextrose/Glucose: 0.00037 (g) * batch size
- Table Sugar: 0.00037 (g) * batch size
For reference I personally do 500ml batches with Corn Syrup as my glucose based reducer so my calculations would be:
- Tri-Sodium Citrate Dihydrate (Sodium Citrate): 0.000294 * 500 = 0.147g
- Salt (Sodium Chloride): 0.00024 * 500 = 0.12g
- Corn Syrup: 0.00048 * 500 = 0.24ml
Method 2 Setup
Ingredients: Salt (Sodium Chloride), and Tri-Sodium Citrate Dihydrate (Sodium Citrate).
You will need to calculate the amount of each ingredient you are going to use based on the following formula:
- Tri-Sodium Citrate Dihydrate (Sodium Citrate): 0.0005 (g) * batch size
- Salt (Sodium Chloride): 0.0002 (g) * batch size
500ml Batch Example
- Tri-Sodium Citrate Dihydrate (Sodium Citrate): 0.0005 * 500 = 0.25g
- Salt (Sodium Chloride): 0.0002 * 500 = 0.1g
Stock Solutions
If you don’t have a precise enough scale to measure your chemicals accurately, you’ll need to use stock solutions.
A stock solution might sound complex, but it’s really just a simple way to dissolve a larger amount of a chemical into a liquid. This lets us measure the liquid instead of needing ultra-precise scales.
Now, let’s make some solutions!
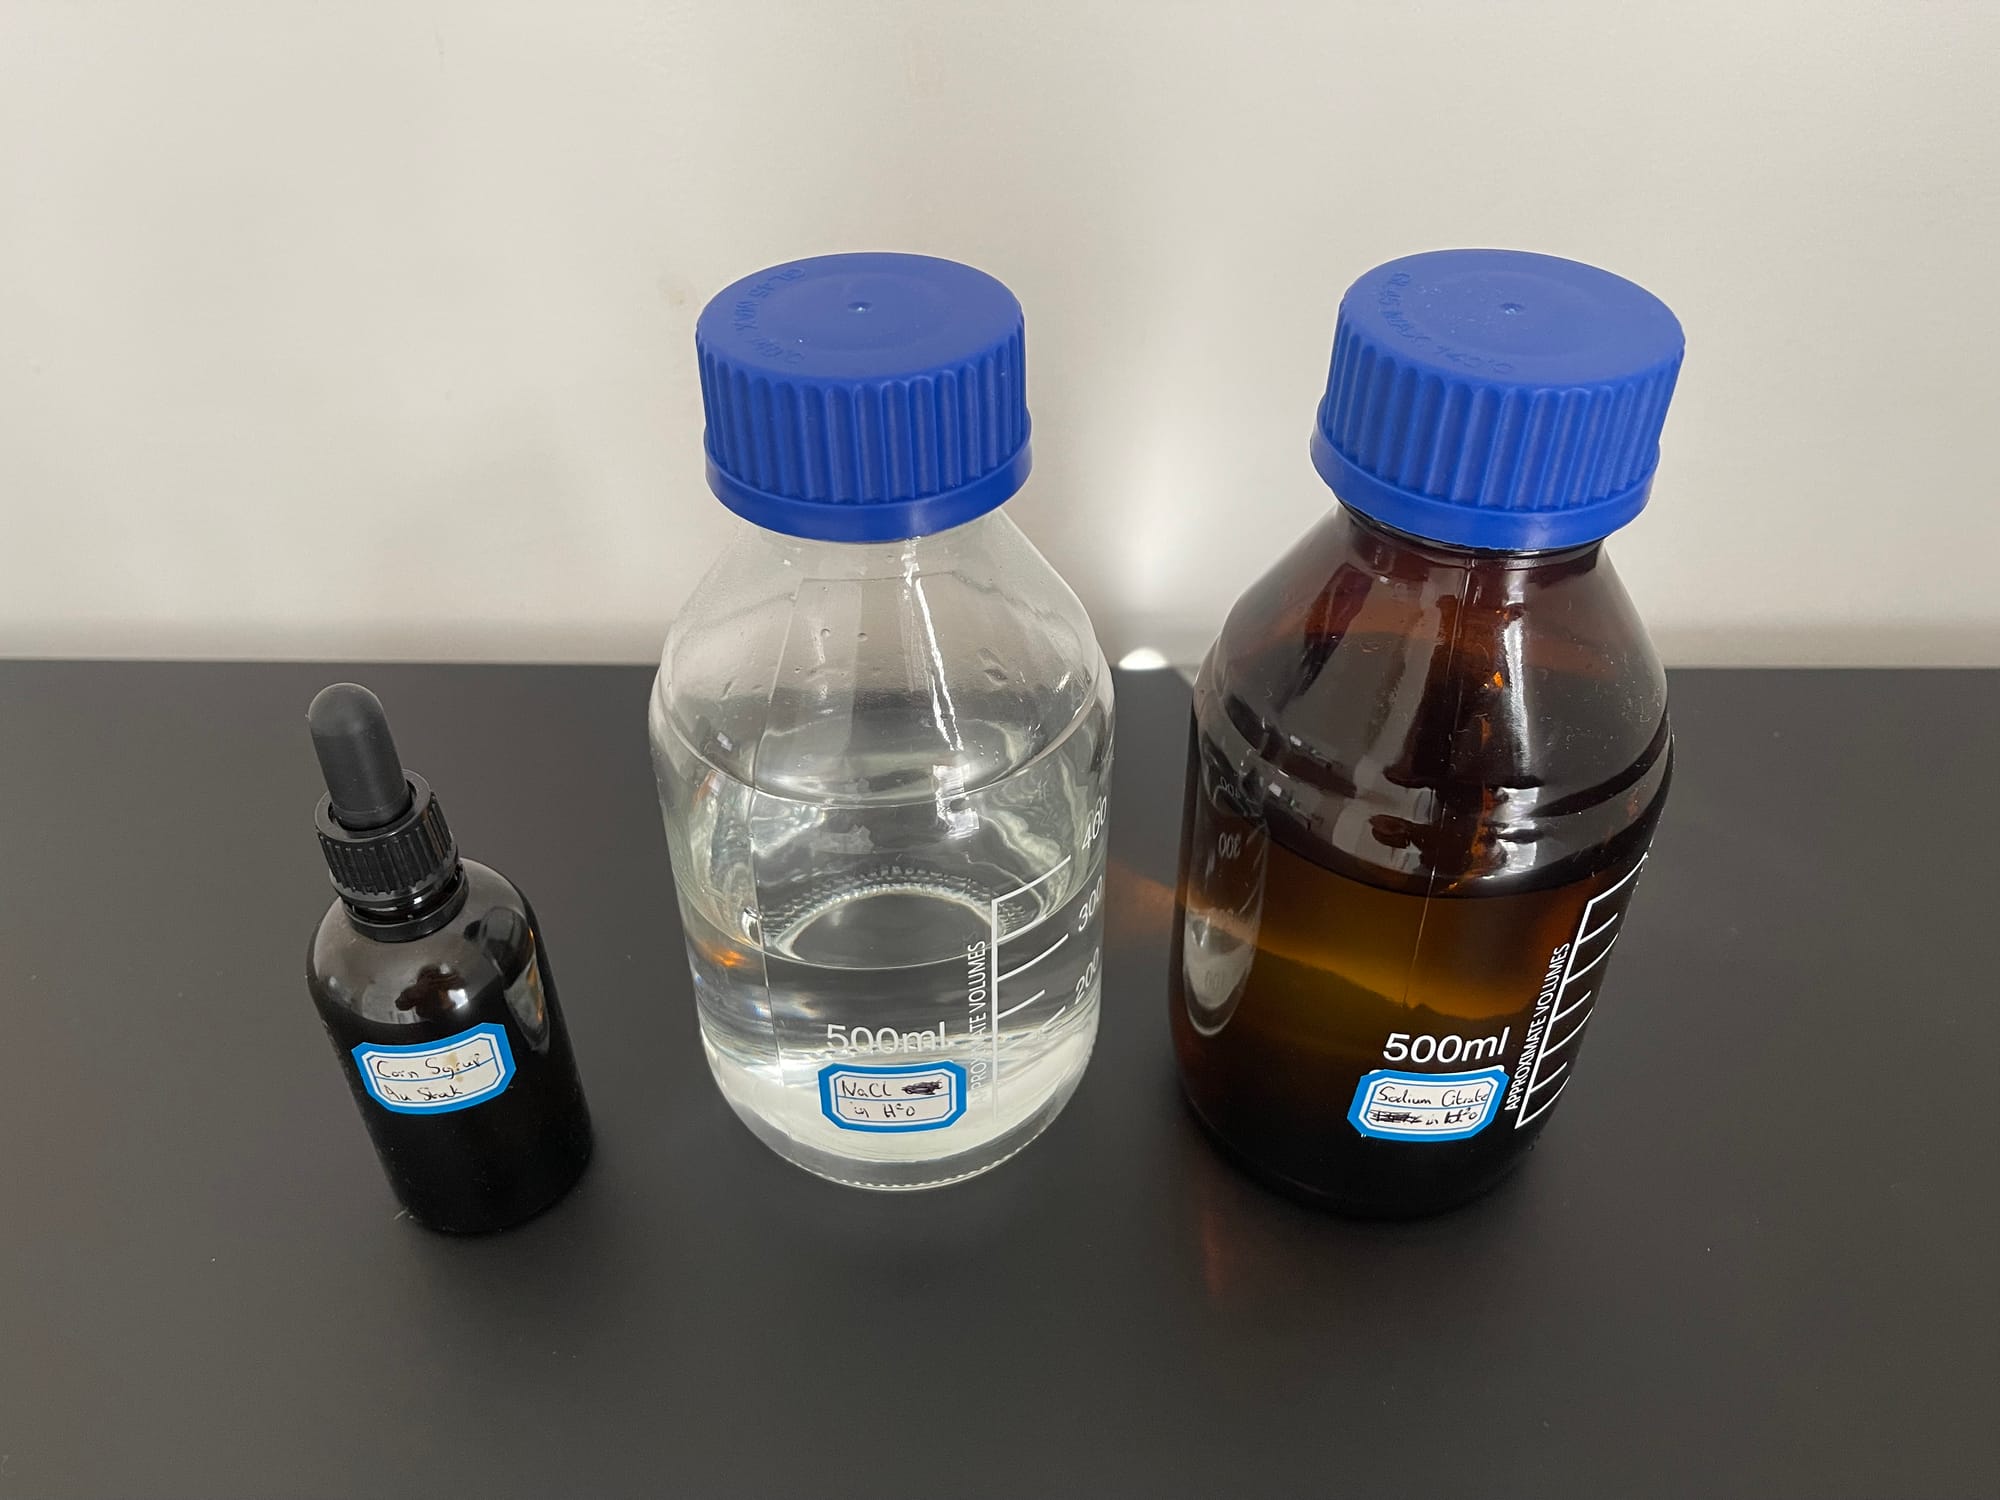
Tri-Sodium Citrate Dihydrate (Sodium Citrate) Stock Solution (1%)
- Dissolve 5g of Tri-Sodium Citrate Dihydrate (Sodium Citrate) in 500ml of distilled water
- This gives you a 1% (10mg / ml) solution
Salt (Sodium Chloride) Stock Solution (0.2%)
- Dissolve 1g of Salt (Sodium Chloride) in 500ml of distilled water
- This gives you a 0.2% (2 mg/ml) solution
Corn Syrup Stock Solution (60%)
- Dissolve 30ml corn syrup in 20ml of boiling distilled water (It will take around 5-30 minutes to dissolve fully into the water. It will almost look as if it's never going to dissolve but it will eventually.
- This gives you estimated 60% (0.03ml / per drop) solution
Dextrose / Glucose Stock Solution (1% Solution)
- Dissolve 5g of Dextrose / Glucose powder in 500ml of distilled water
- This gives you a 1% (10mg / ml) solution
Table Sugar Stock Solution (1% Solution)
- Dissolve 5g of table sugar in 500ml of distilled water
- This gives you a 1% (10mg / ml) solution
You might also want to make smaller stock solutions, like 100ml instead of 500ml, depending on your batch size and how much colloidal gold you plan to make. All you need to do is adjust the quantities accordingly. For example, you could use 1g of sodium citrate in 100ml of water instead.
Building Your Solution
At this point, you should have your method chosen, your stock solutions prepared, or your chemicals weighed out. Now, it’s time to add everything into your glass container. If you’ve already weighed out your chemicals, go ahead and add them into the container.
Solution Examples
If you're using stock solution, I've provided a few examples below to help you measure the right amount of each stock solution for this process
400ml batch using Method 1
- Corn Syrup: 0.00048 * 400 = 0.192 (0.192ml)
0.192 / 0.03 = 6.4 drops stock solution (Round to 6) - Salt (Sodium Chloride): 0.00024 * 400 = 0.096 (96mg)
0.096 / 0.002 = 48ml stock solution - Tri-Sodium Citrate Dihydrate (Sodium Citrate): 0.000294 * 400 = 0.1176 (118mg (rounded up))
0.118 / 0.01 = 11.8ml stock solution
500ml batch using Method 2
- Salt (Sodium Chloride): 0.0002 * 500 = 0.1 (100mg)
0.1 / 0.002 = 50ml stock solution - Tri-Sodium Citrate Dihydrate (Sodium Citrate): 0.0005 * 500 = 0.25 (250mg)
0.25 / 0.01 = 25ml stock solution
1200ml batch using Method 1
- Corn Syrup: 0.00048 * 1200 = 0.576 (0.576ml)
0.576 / 0.03 = 19.2 drops stock solution (Round to 19) - Salt (Sodium Chloride): 0.00024 * 1200 = 0.288 (288mg)
0.288 / 0.002 = 144ml stock solution - Tri-Sodium Citrate Dihydrate (Sodium Citrate): 0.000294 * 1200 = 0.3528 (353mg (rounded up))
0.353 / 0.01 = 35.3ml stock solution
250ml batch using Method 2
- Salt (Sodium Chloride): 0.0002 * 250 = 0.05 (50mg)
0.1 / 0.002 = 25ml stock solution - Tri-Sodium Citrate Dihydrate (Sodium Citrate): 0.0005 * 250 = 0.125 (125mg)
0.25 / 0.01 = 12.5ml stock solution
Online Calculator
Of course, I’ve also got you covered with an online calculator that’ll save you from the hassle of doing all the math yourself. This is exactly what my web developer skills were made for 😂!
Once you have the amount of each stock solution calculated, you can go ahead and put those amounts into your glass container.
Add Your Distilled Water
Once you’ve added the chemicals to your glass container, it’s time to top it up to reach your estimated batch size. For example, if you’re making a 500ml batch using stock solutions and your container is already at around 75ml full, you’ll need to add distilled water until the total volume reaches 500ml. If you measured your chemicals with a precise scale, simply add water until the container reaches your calculated batch size.
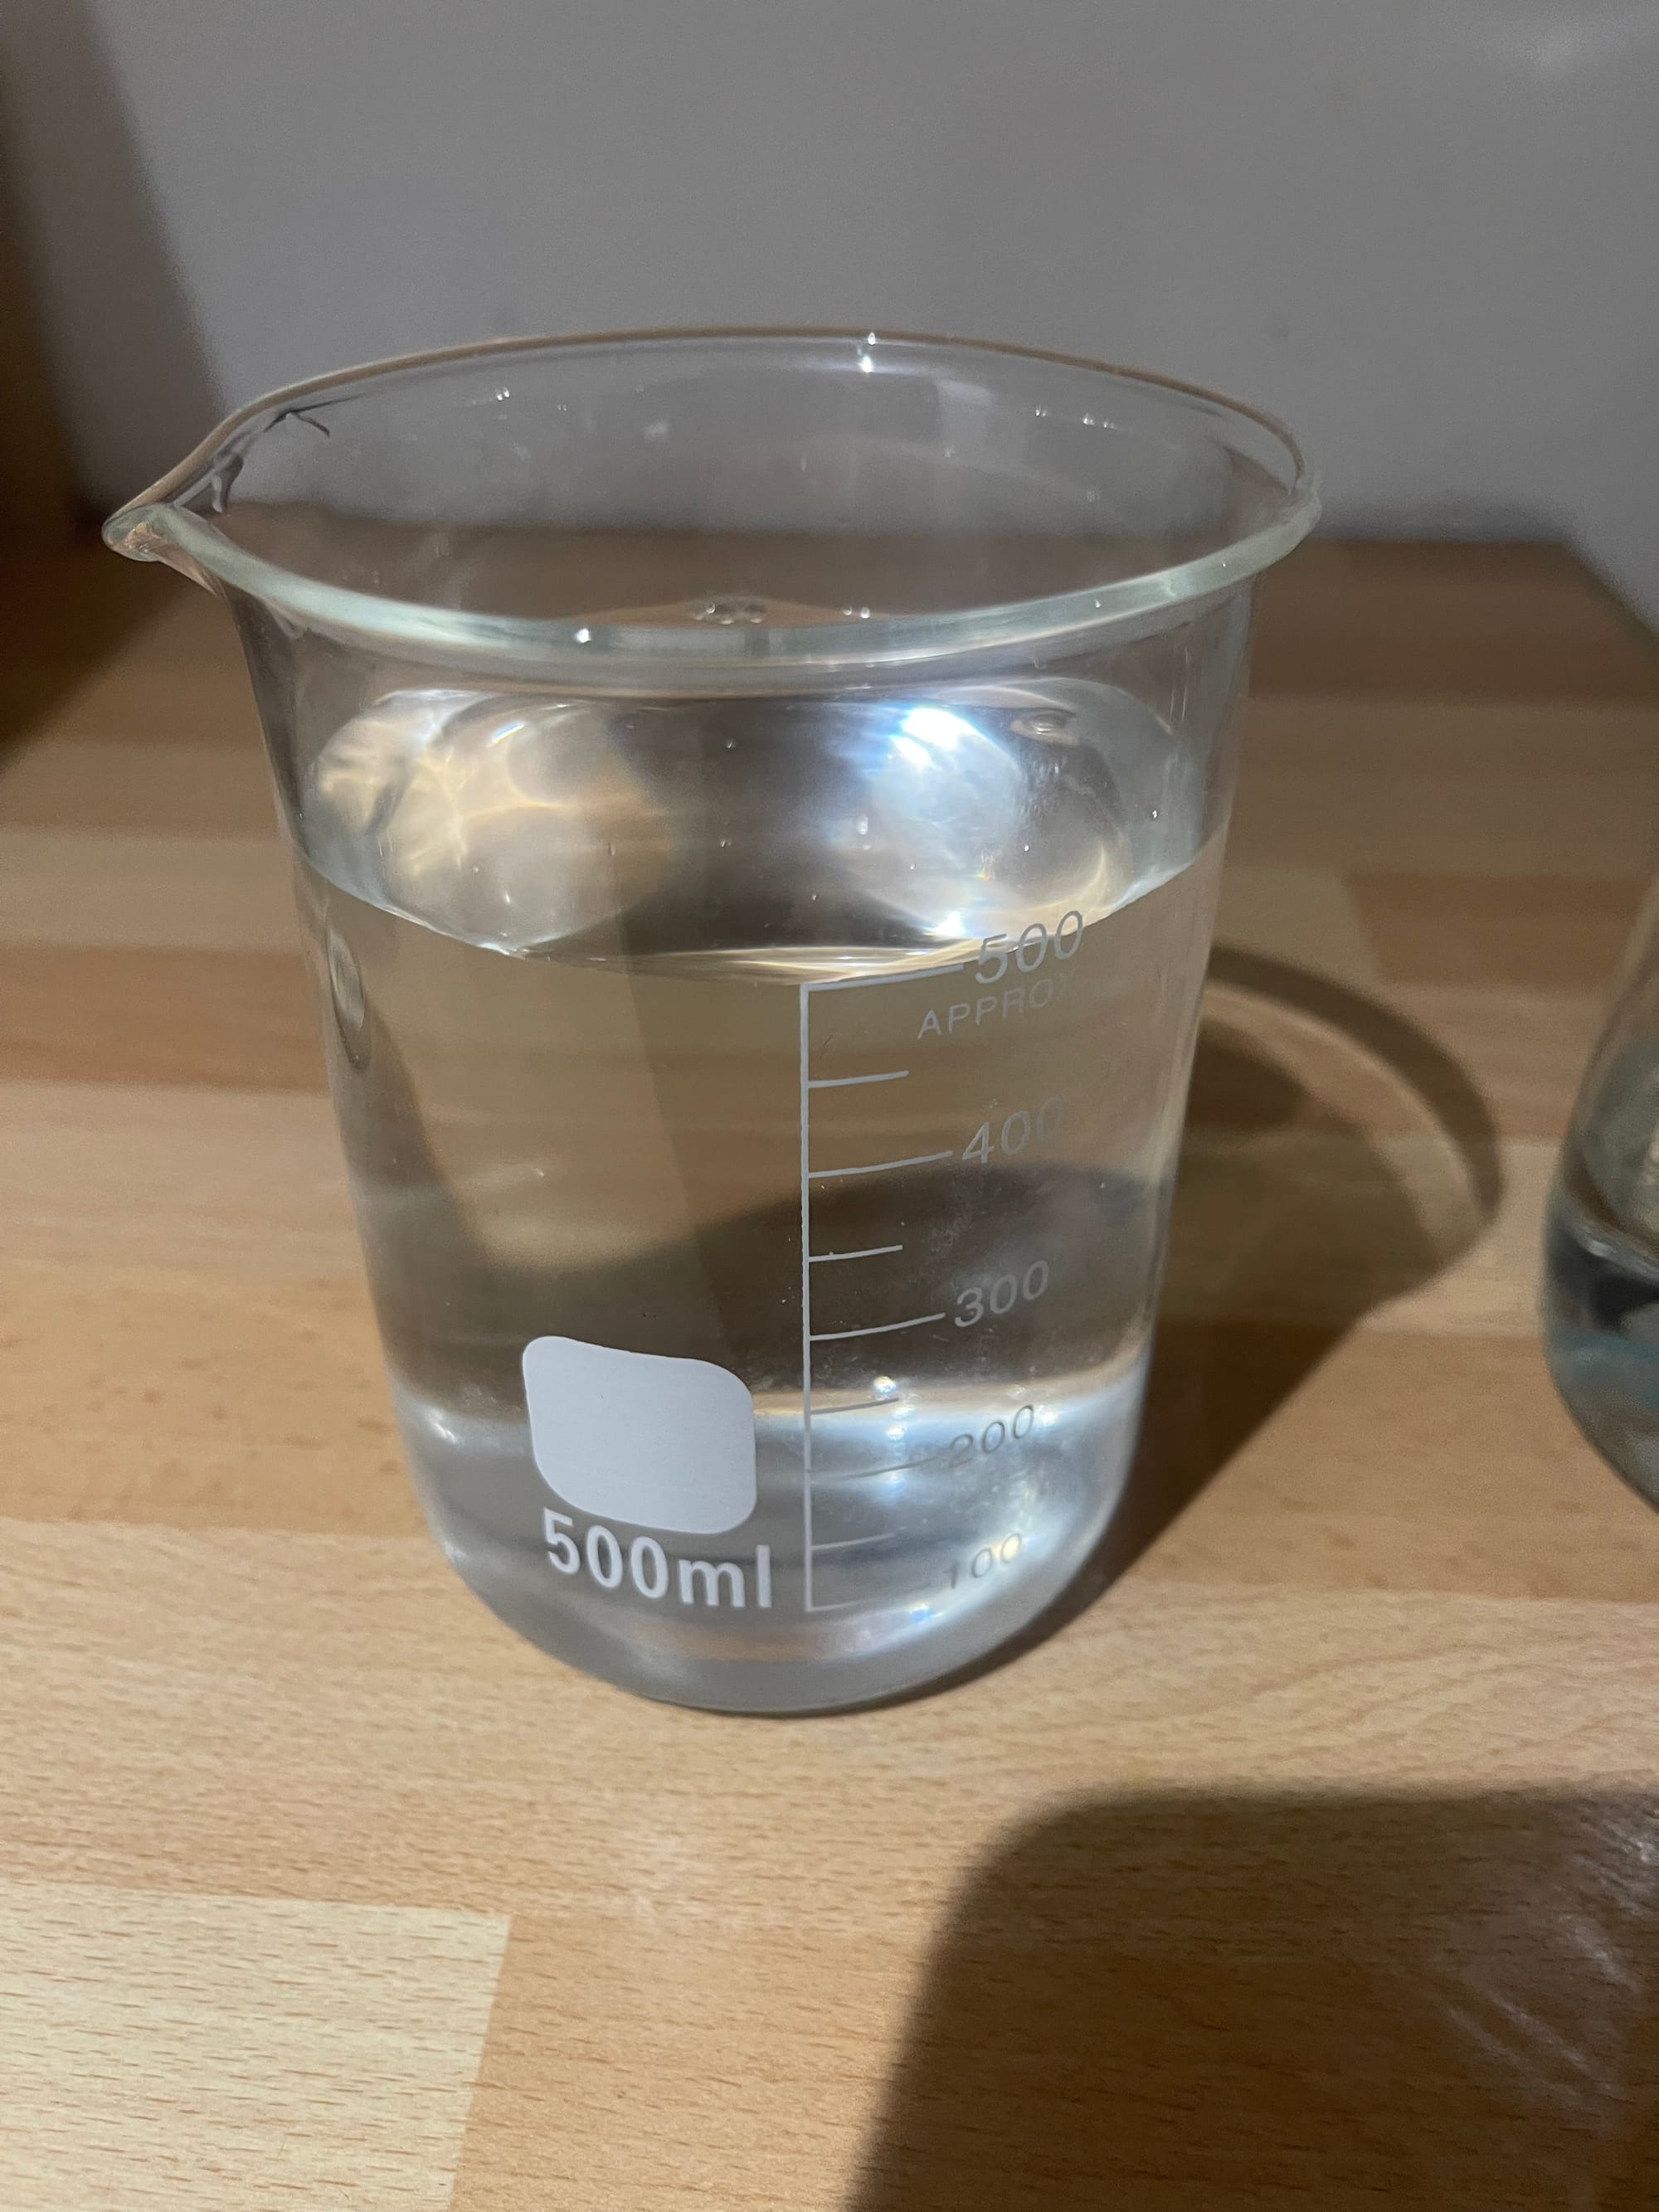
If your distilled water has been sitting for a while, consider boiling it for a couple of minutes to eliminate any potential bacteria or microbes, ensuring your solution remains uncontaminated.
Setting The Power Supply Up
You should have your electrolysis setup ready and your glass container with the solution mixed in. Now, we're going to setup your power supply leads, to make sure they are connected to the right metals and positioned correctly. You’re almost there — it’s nearly time to see the gold!
Attaching Your Metals
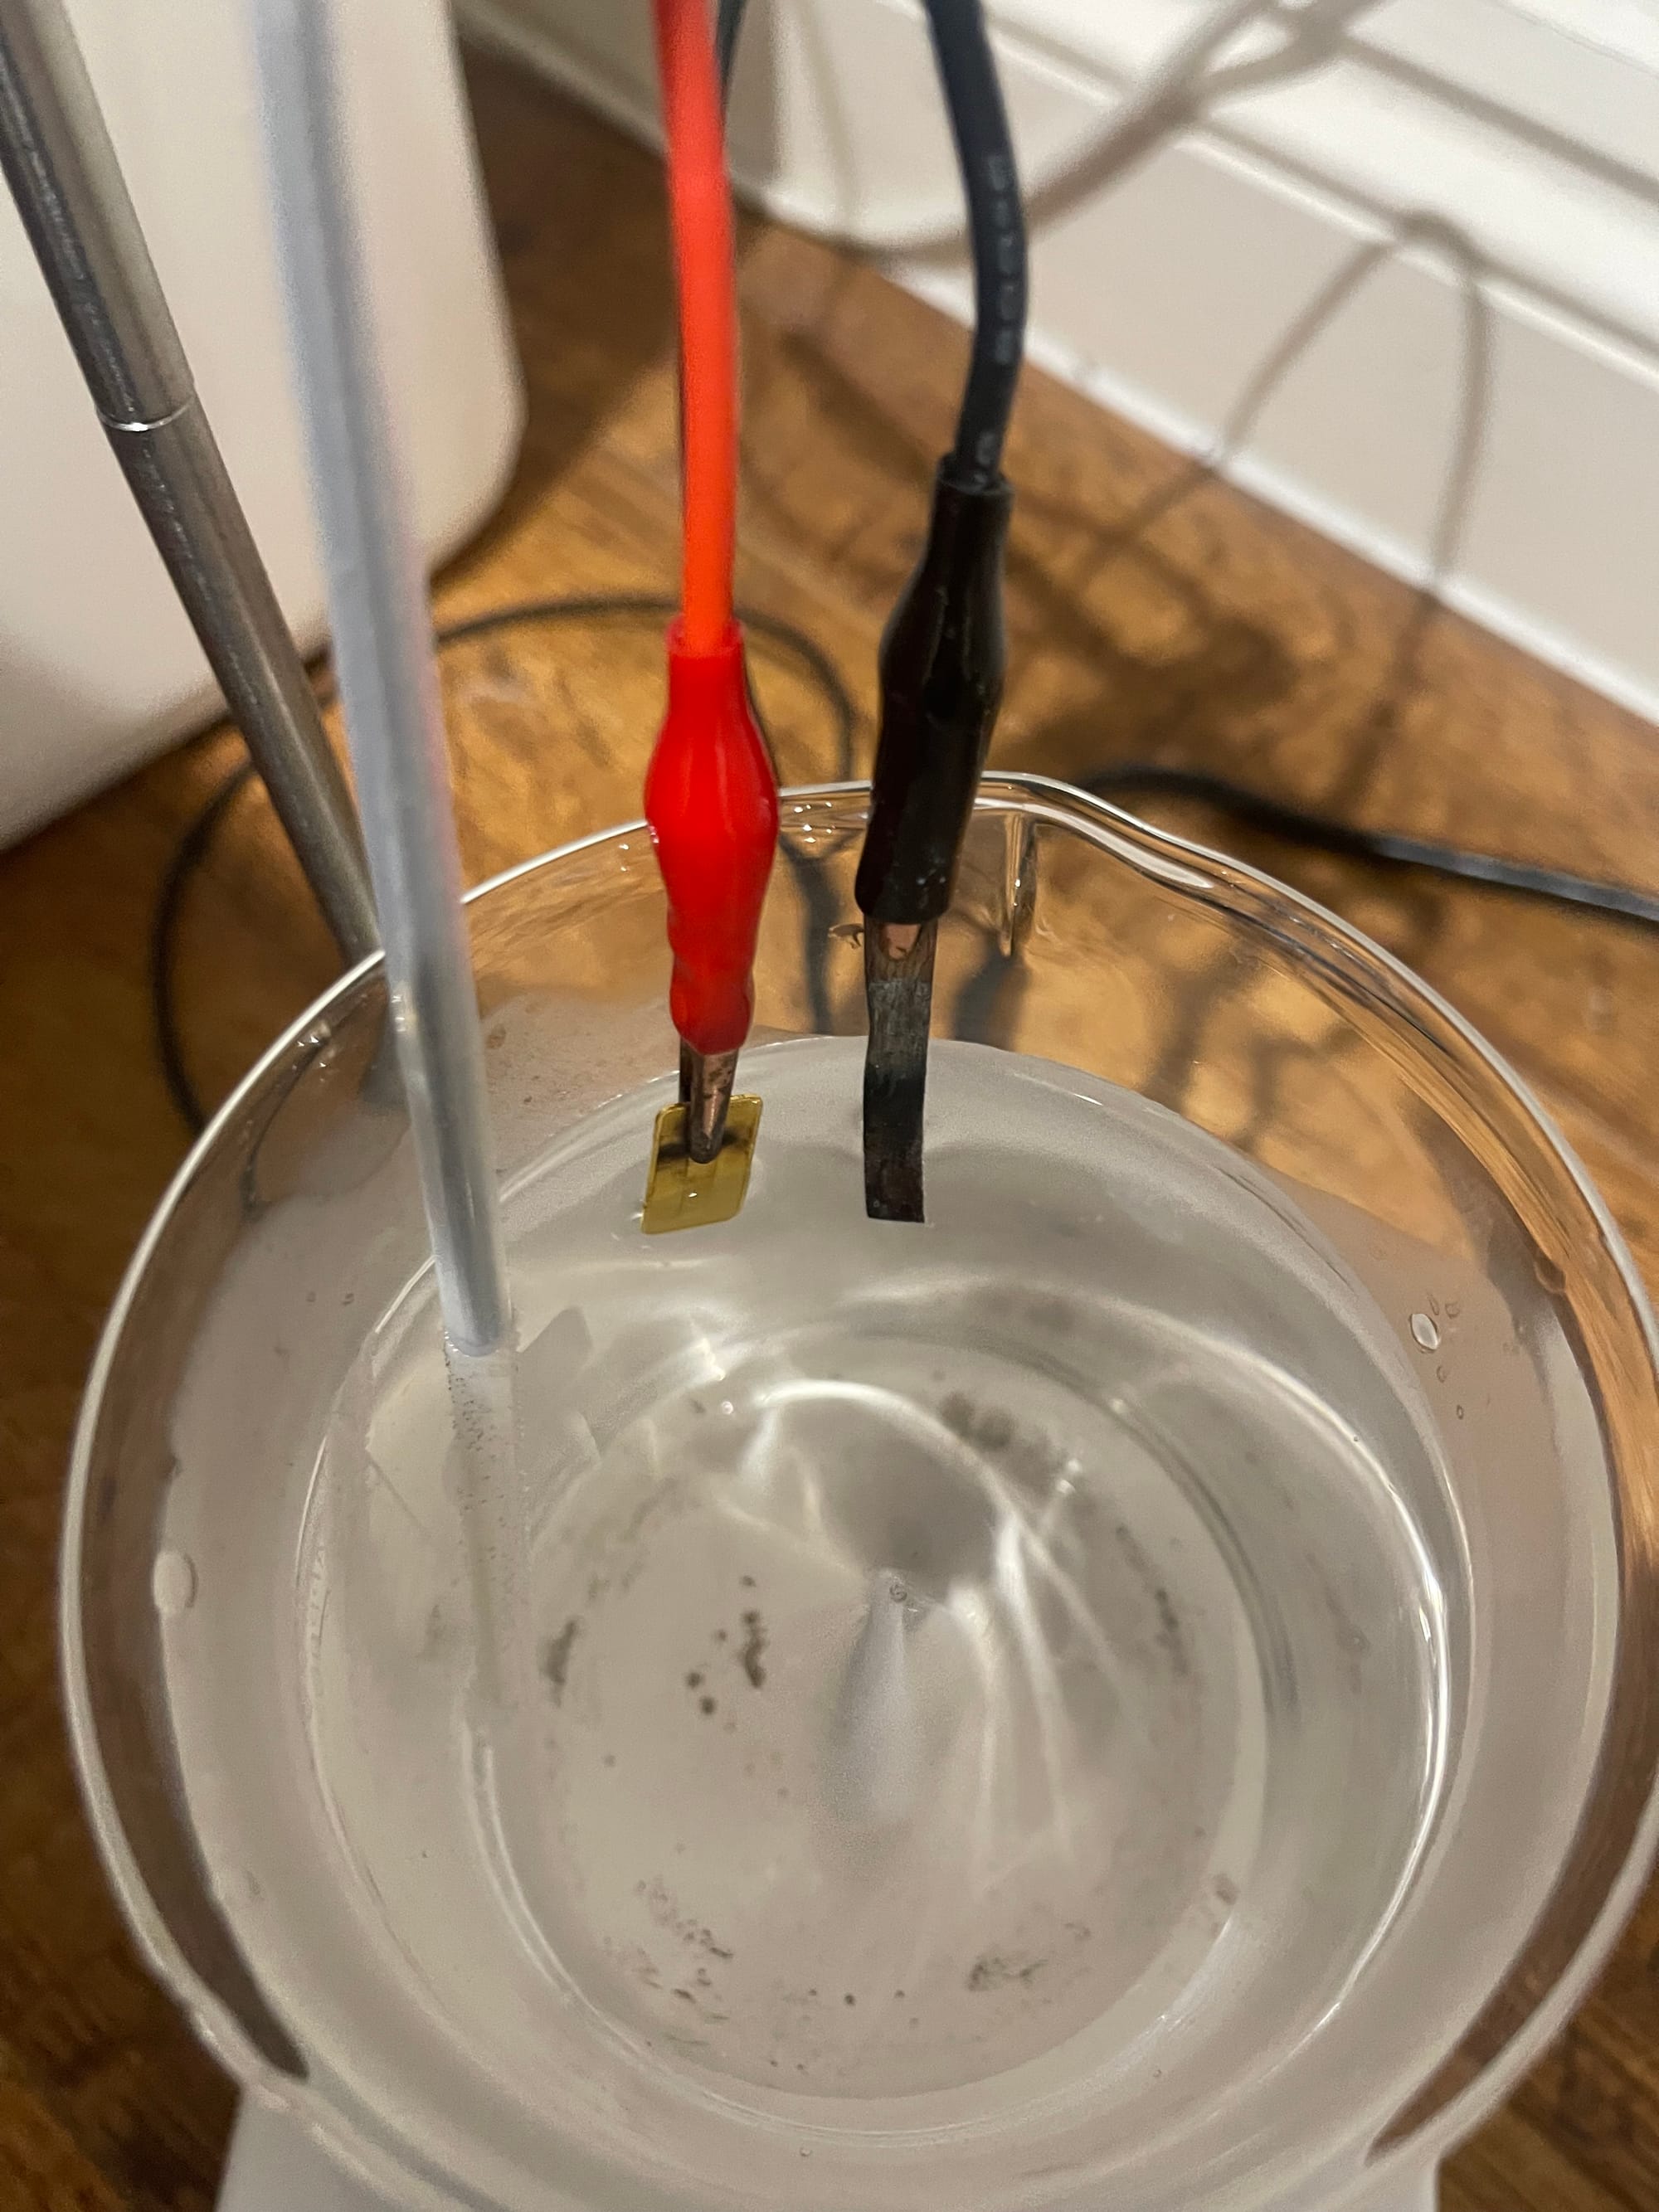
Attach your piece of gold to the positive electrode (red wire), and connect either another piece of gold, copper, or a recommended material to the negative electrode (black wire).
It’s also worth noting that you should try to attach a larger piece of metal to your black wire than to the red wire. While this isn’t crucial, it can help with the process by ensuring better control over the release of gold ions from your gold bar, as well as enhancing the stability of your final solution.
Wire Positions
As I mentioned earlier, it’s a good idea to set up a system where you can control the position of the wires using clips, clamps, or similar tools. Now is the time to use these to position the wires so that only the metals are submerged in the water. The crocodile clip should never touch the water, as it could contaminate the solution by creating unwanted by-products, depending on the metal it’s made from.
Additionally, ensure that the black and red wires do not touch each other, as this could create a short circuit and potentially damage your power supply. The ideal distance between the wires should be around 0.5 to 1 inch.
Setting The Power
What voltage? What Amps? How Long? James please help me out — don't worry this parts really easy, you just have to stick to a few rules.
For voltage, any range between 12v and 30v works perfectly. As for amps, don’t stress too much, because the reaction will draw more or less current based on a few factors:
- The size of your batch (e.g., 250ml, 1000ml, etc.)
- The distance between your electrodes (the positive and negative wires in the water)
- Whether you’re using method 1 or method 2
By adjusting these factors, the system will naturally regulate the current for you.
Key Rules
- Lower than 12V may be too slow or ineffective — you don't want to be waiting around for hours.
- Higher than 30v can result in large, unstable particles or unwanted byproducts, leading to more black specs and gold falling out of the solution — something you definitely want to avoid.
Example Timeframes With Different Voltages
For example, if you’re aiming for a 10ppm colloidal gold concentration in a 500ml solution, the process could take varying amounts of time due to the many factors involved. There’s no exact formula for timing, so the best approach is to dive in with your first batch and time how long it takes. This will give you a better sense of how the process works for your specific setup and conditions.
Some examples time frames could be:
- 2 Hours using 12v power supply
- 49 Minutes using 30v power supply
Let's Begin... Show me the gold
It’s finally time — you’re about to see the gold! All your prep work is done, and now it’s time to power up. Before you do, double-check this pre-flight checklist:
- Chemicals / Stock solutions added into water.
- Your glass container has been topped up with distilled water to your desired batch size.
- Your power supply is setup with the correct voltage and amps.
- Your power supply wires have the metals you've chosen clipped to them.
- Only the metals are in the water — crocodile clips must not be submerged.
- Your power supply wires are spaced apart so they're not touching.
If you’ve checked off everything on this list, you’re ready to heat your solution to the correct temperature. Then, it’s time to turn on the power and watch the gold come to life!
Heat The Solution
Heat the solution to 90°C (194°F) — this is the temperature your solution needs to stay at for the entire process. It’s fine if the temperature shifts by 5-10 degrees in either direction, but ideally, you should maintain 90°C (194°F).
If you don’t have a way of measuring the temperature, simply keep the solution just below a boil, where it’s steaming but not fully boiling.
The reason you need to keep the solution at 90°C is that it enhances the speed of reduction of your gold ions. Additionally, it helps create smaller, more uniform nanoparticles and prevents aggregation (clumping) of the nanoparticles, reducing the chance of black specs forming in your solution.
Turn On Power Supply
Once your solution reaches 90°C (194°F), you can now turn on your power supply. A couple of things should happen when you do:
- The black wire (negative electrode) should start producing lots of bubbles.
- The red wire (positive Electrode) should show a couple bubbles, but not as much as the cathode
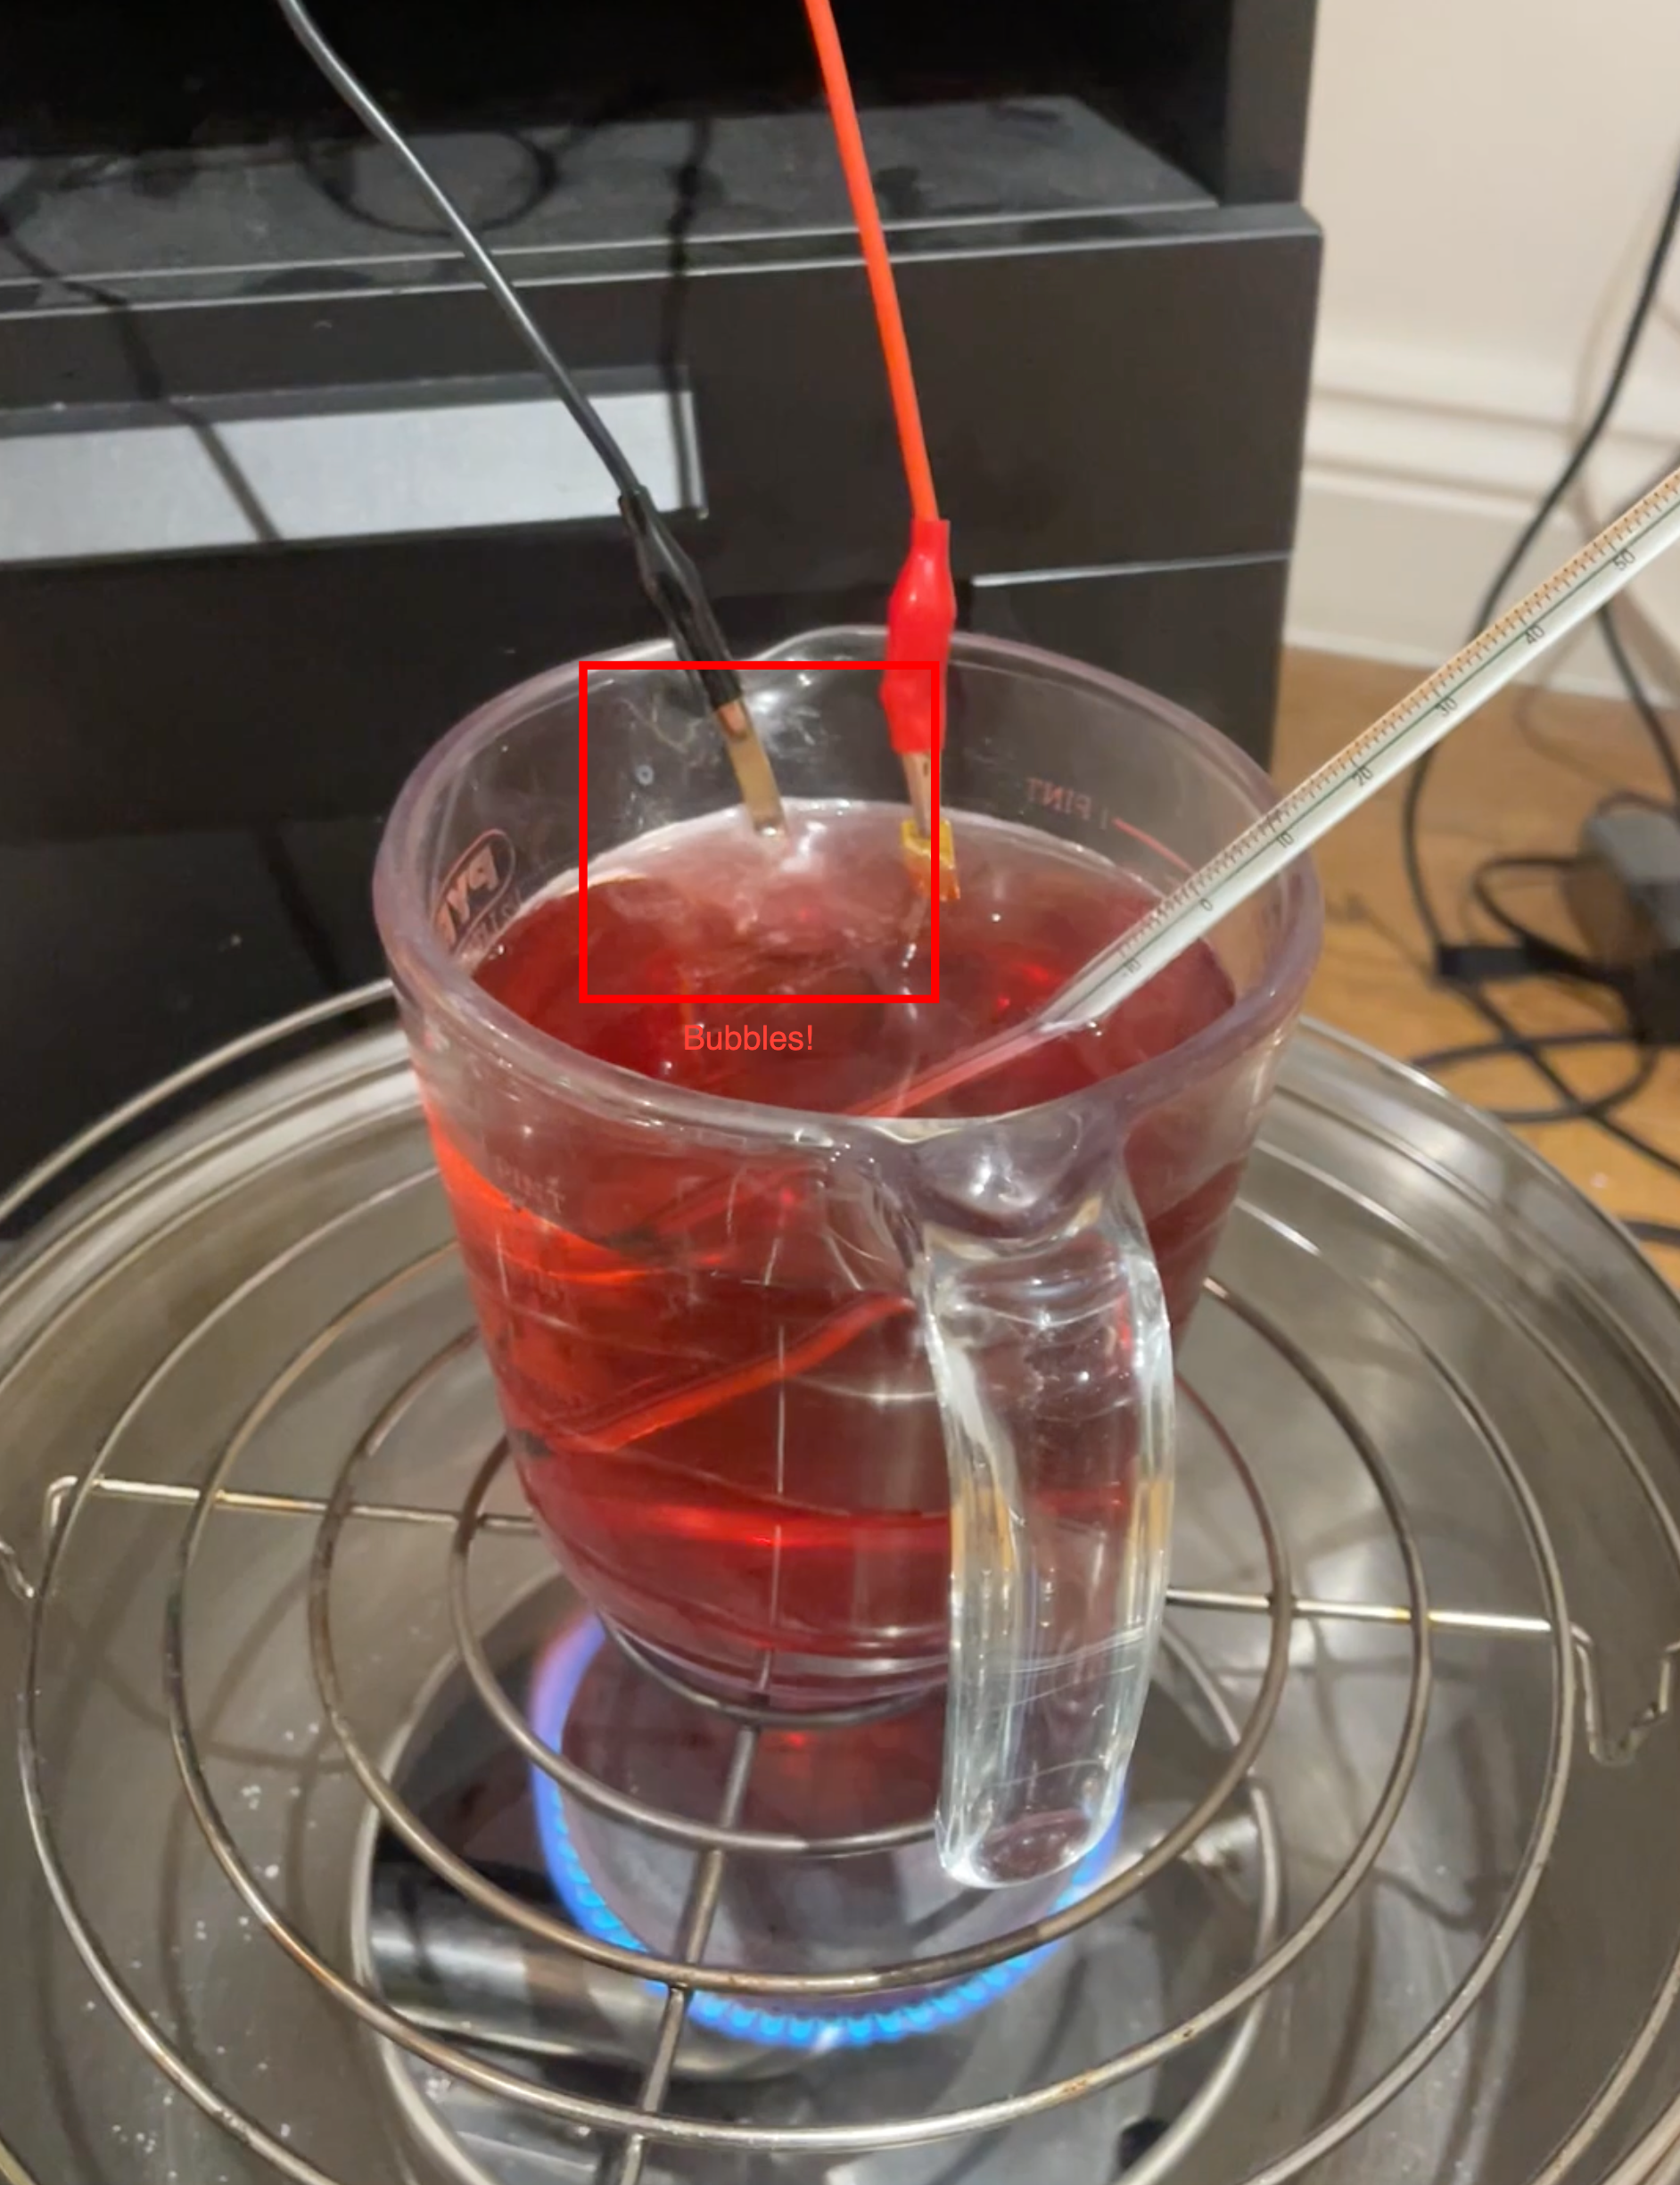
At this point, it’s a waiting and monitoring game. Depending on whether you have a lid or cover for your container, you’ll need to check back every 15-30 minutes to replace any evaporated water. Be sure to top up with distilled water to keep the electrodes (the metal attached to your red and black wires) submerged. However, avoid filling the container too high, as you don’t want the crocodile clips to touch the water.
When Is The Colloidal Gold Completed?
As the process continues, you’ll notice the solution changing colour — from pink to red, then to ruby-red, which is the sweet spot. If you keep going, the solution will eventually turn purple and then black.

The reason it turns purple and black is that the particle sizes start to grow and aggregate (clump) together. This is undesirable because, if you’re making colloidal gold for consumption, you want the particles to be as small as possible.
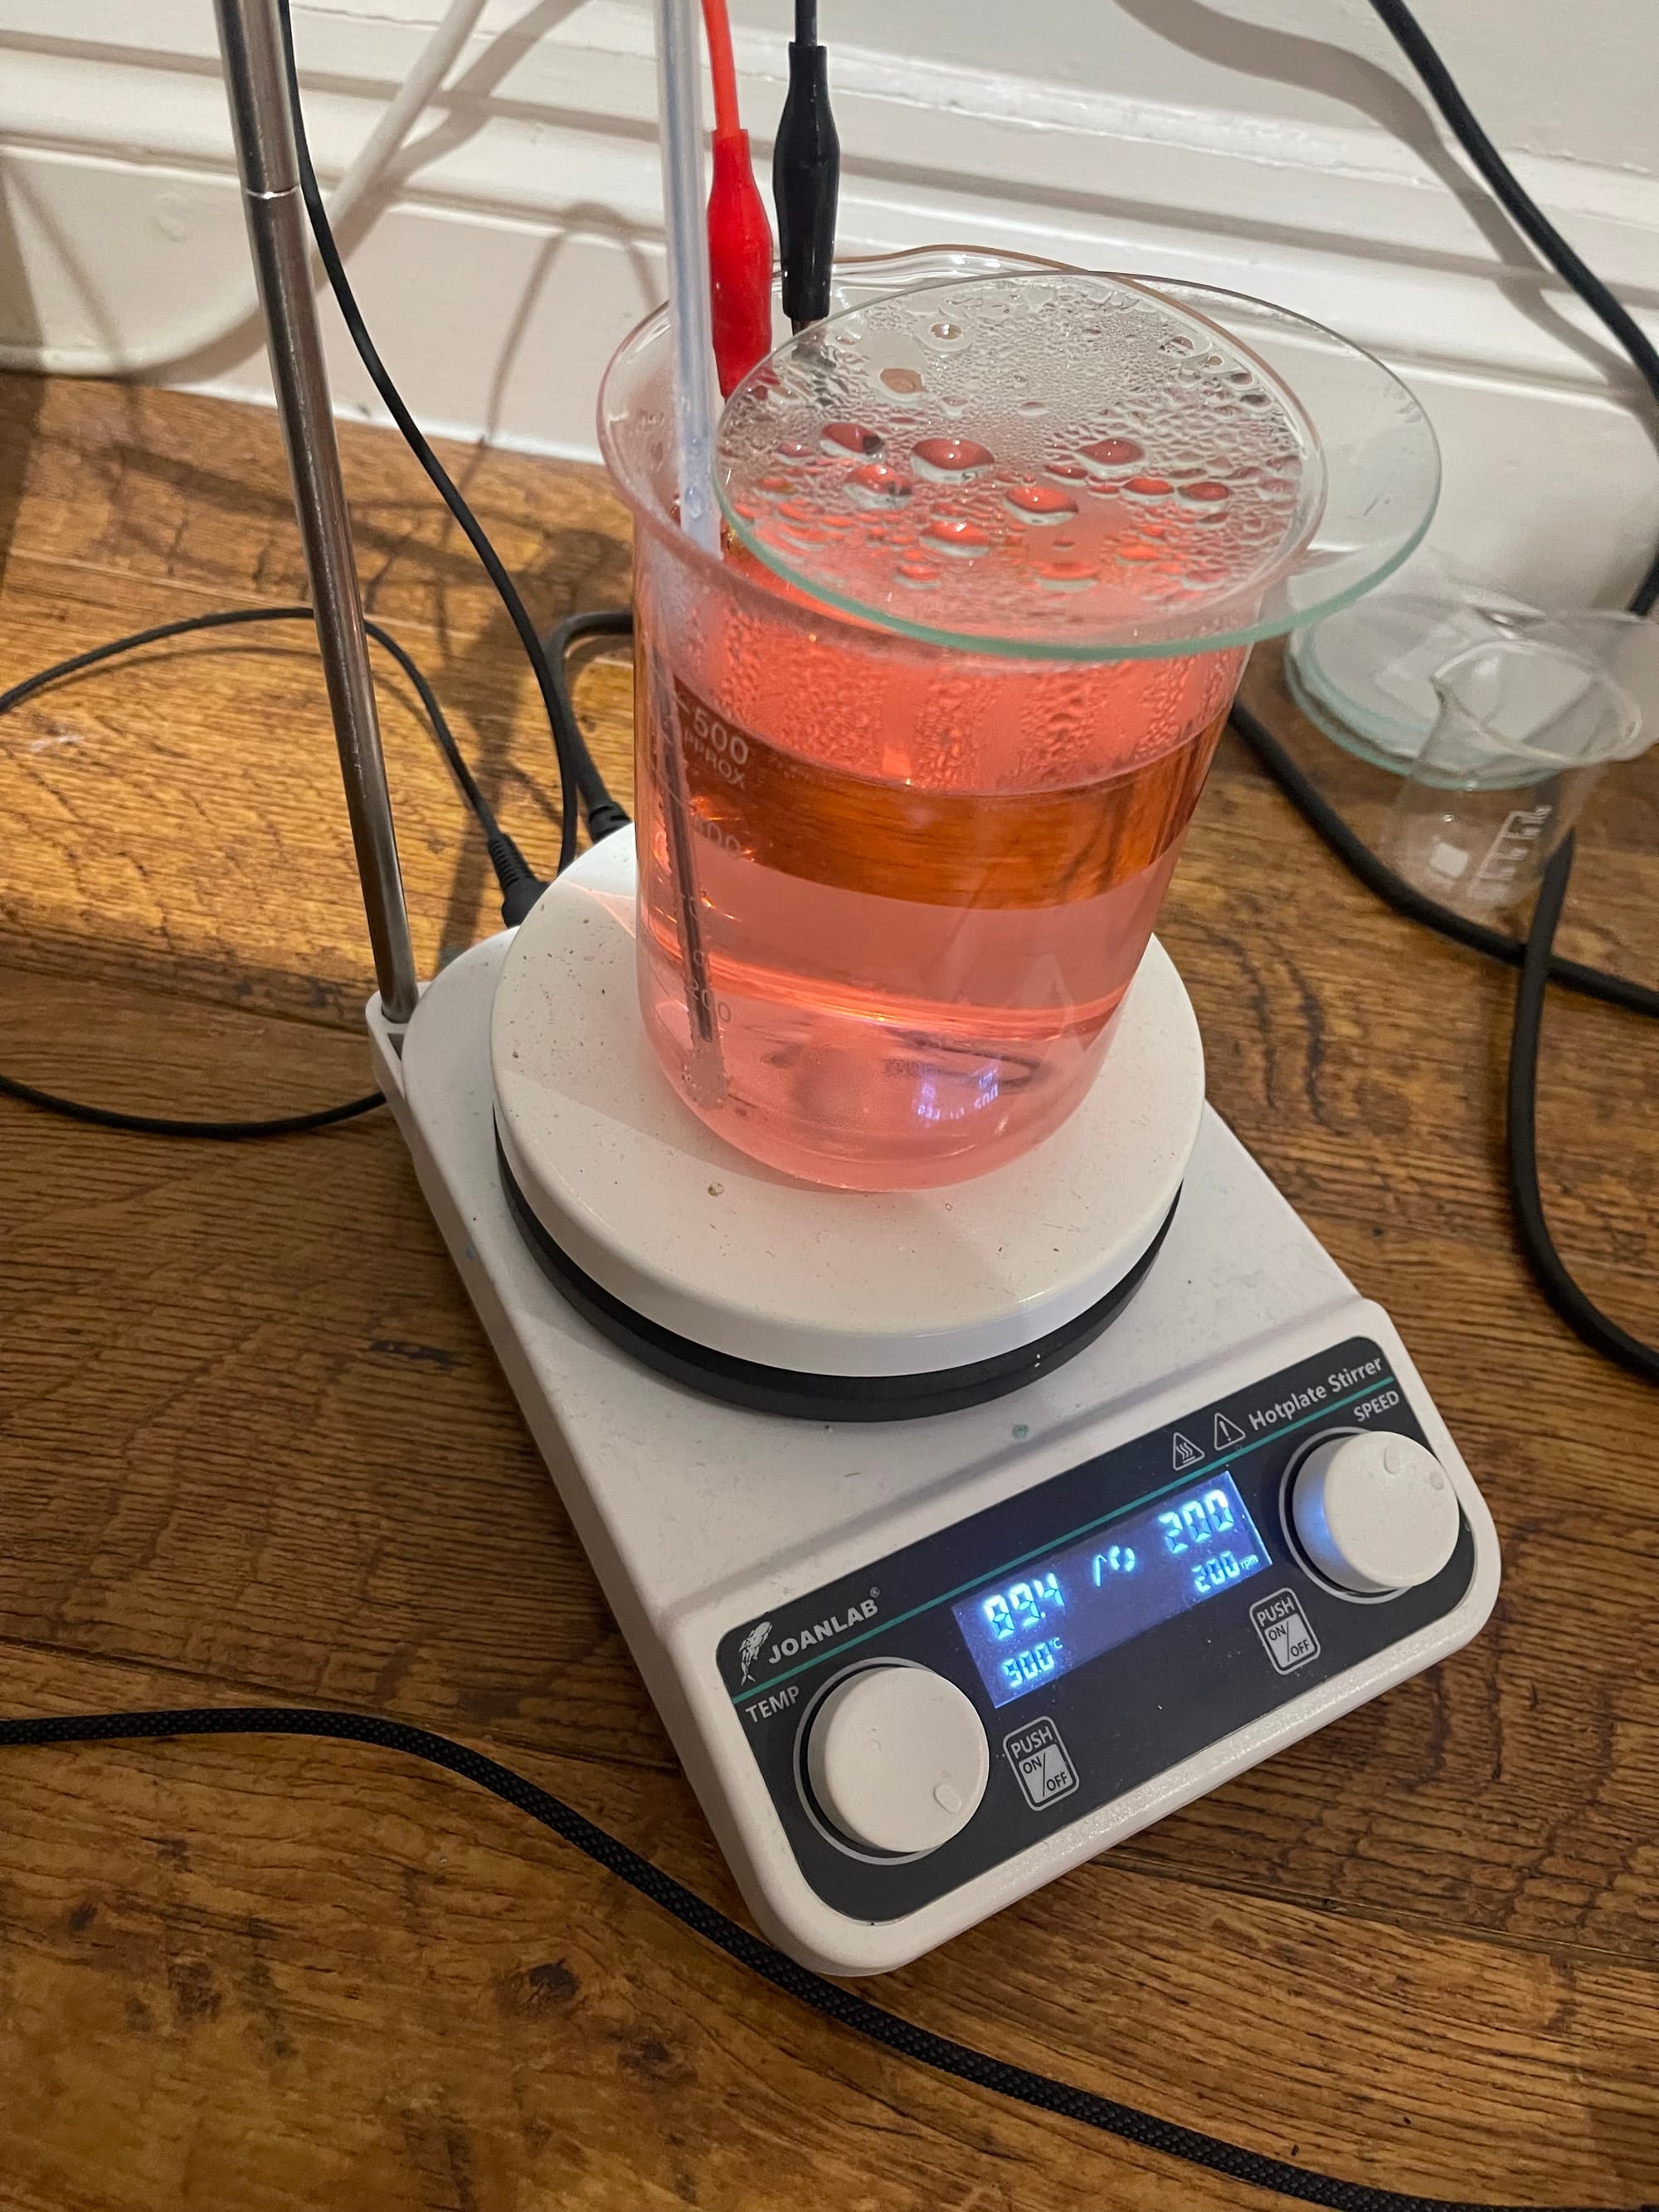
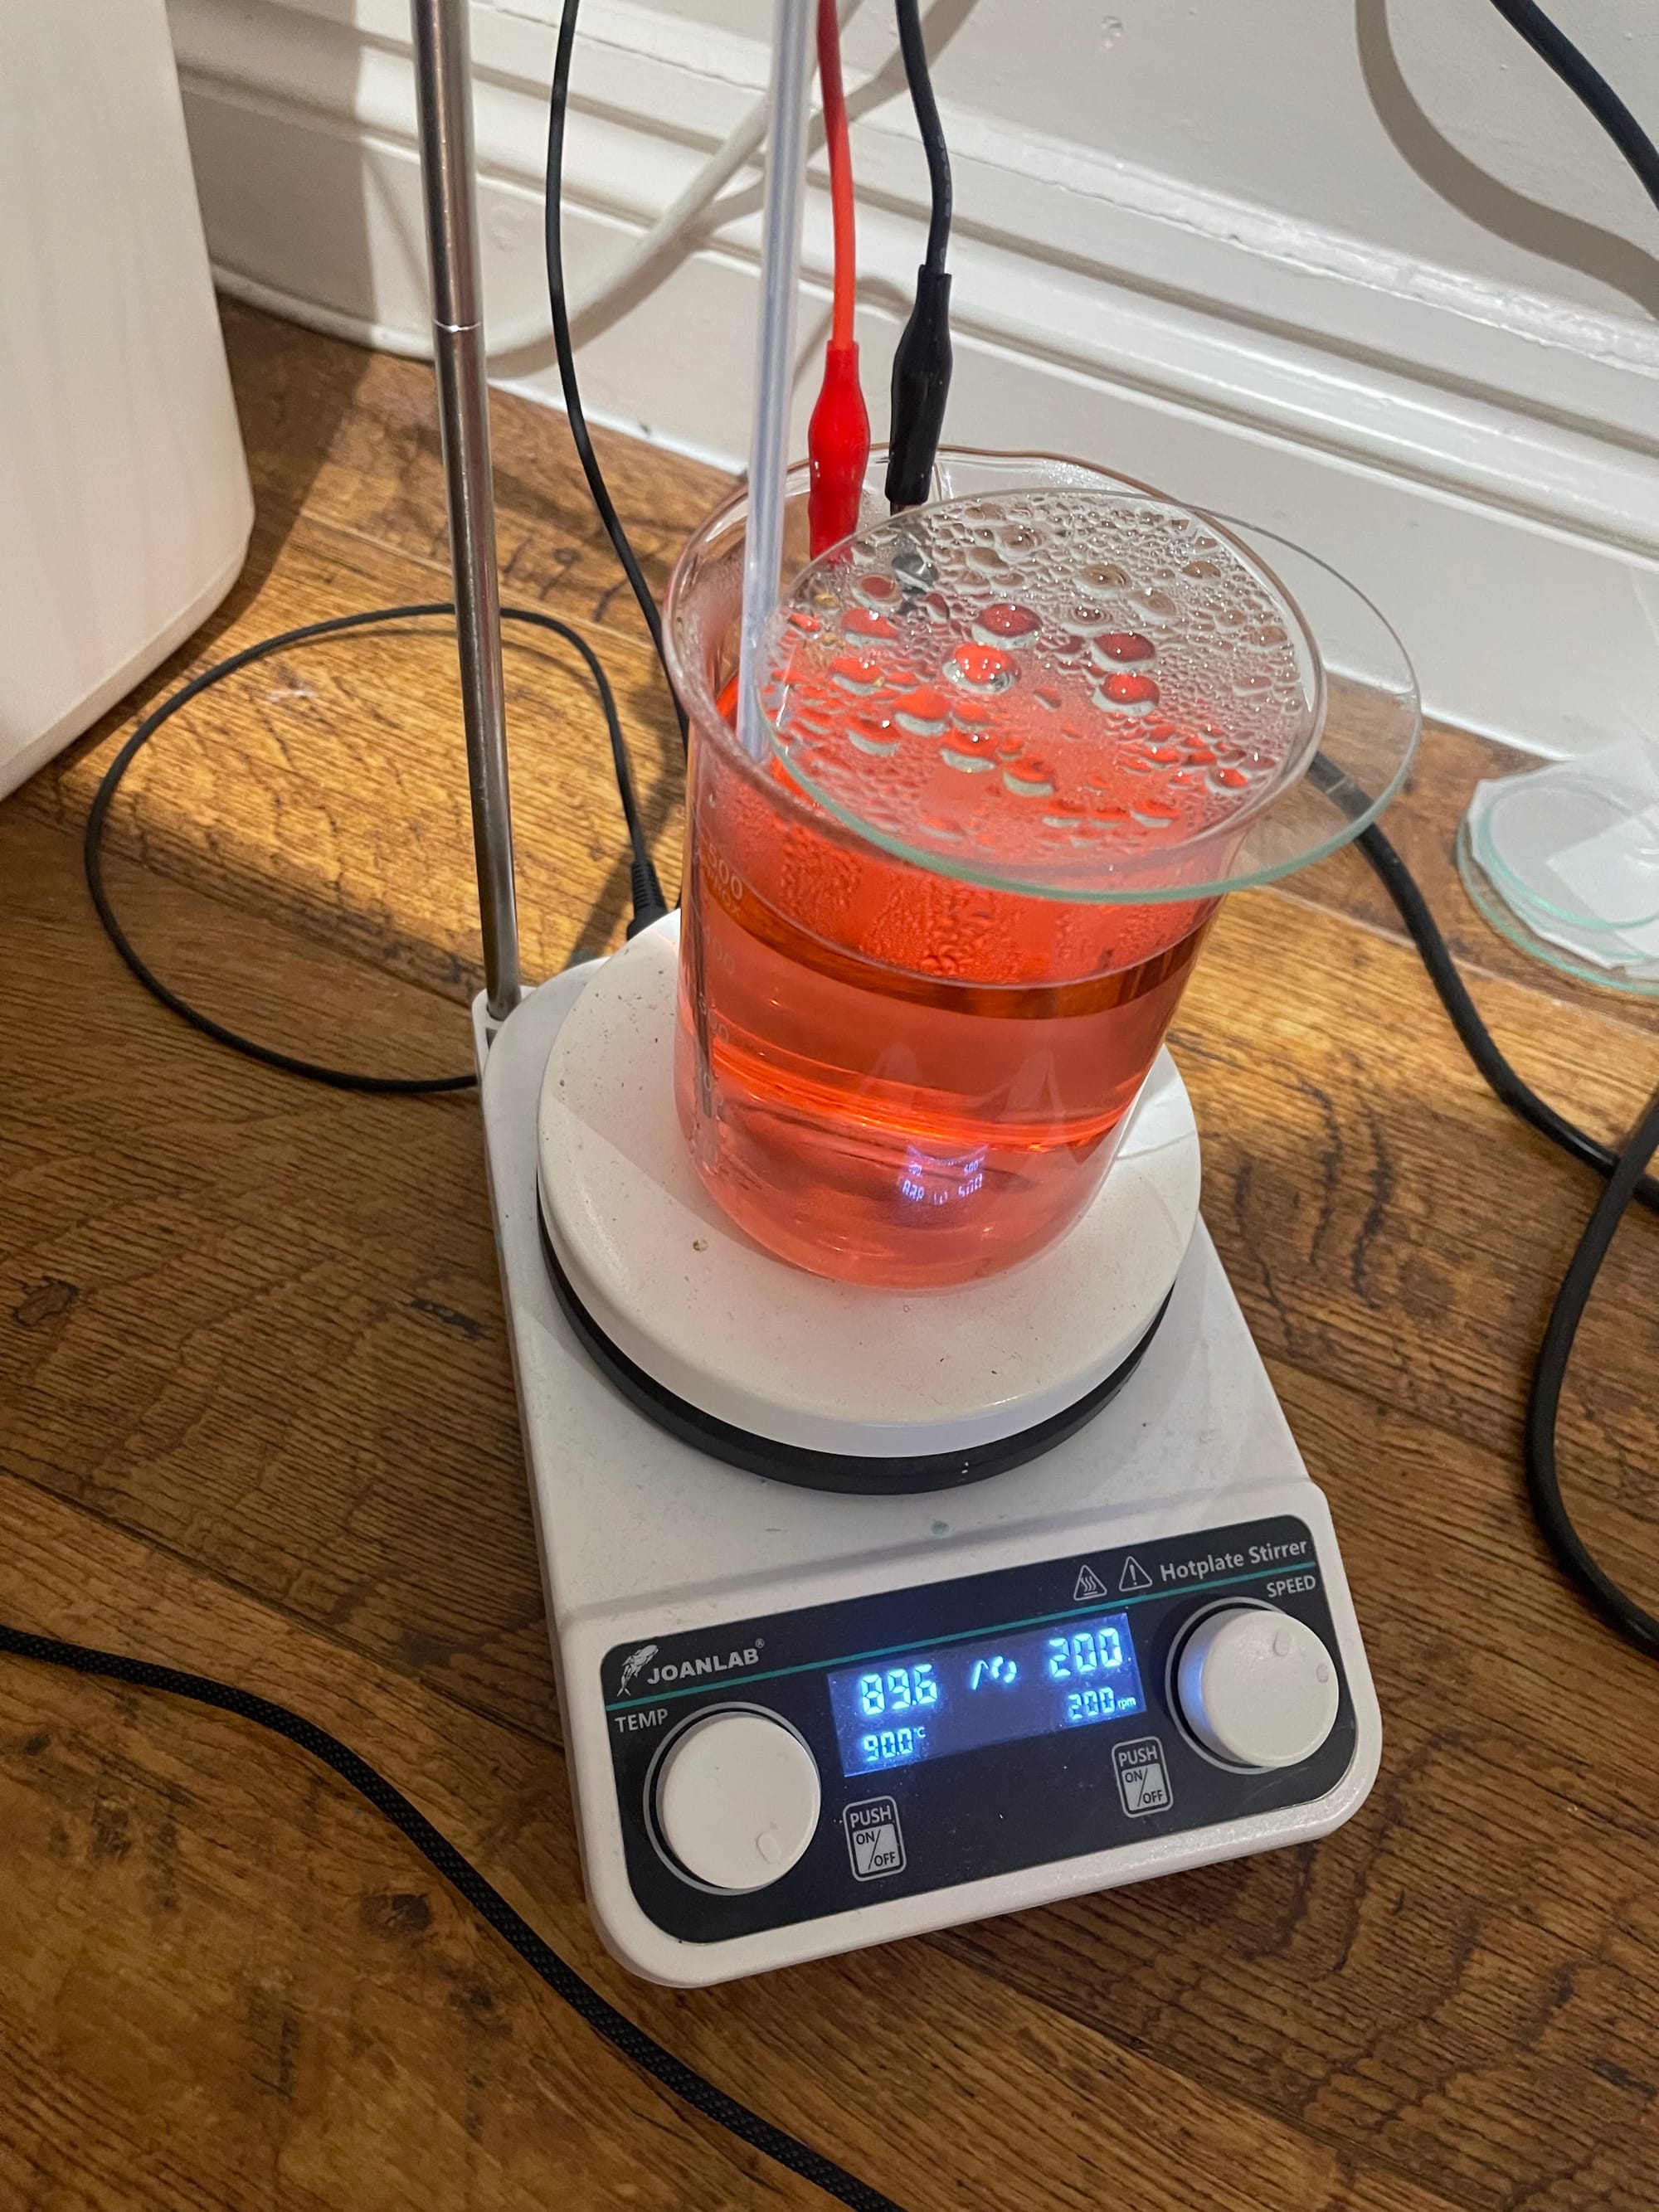
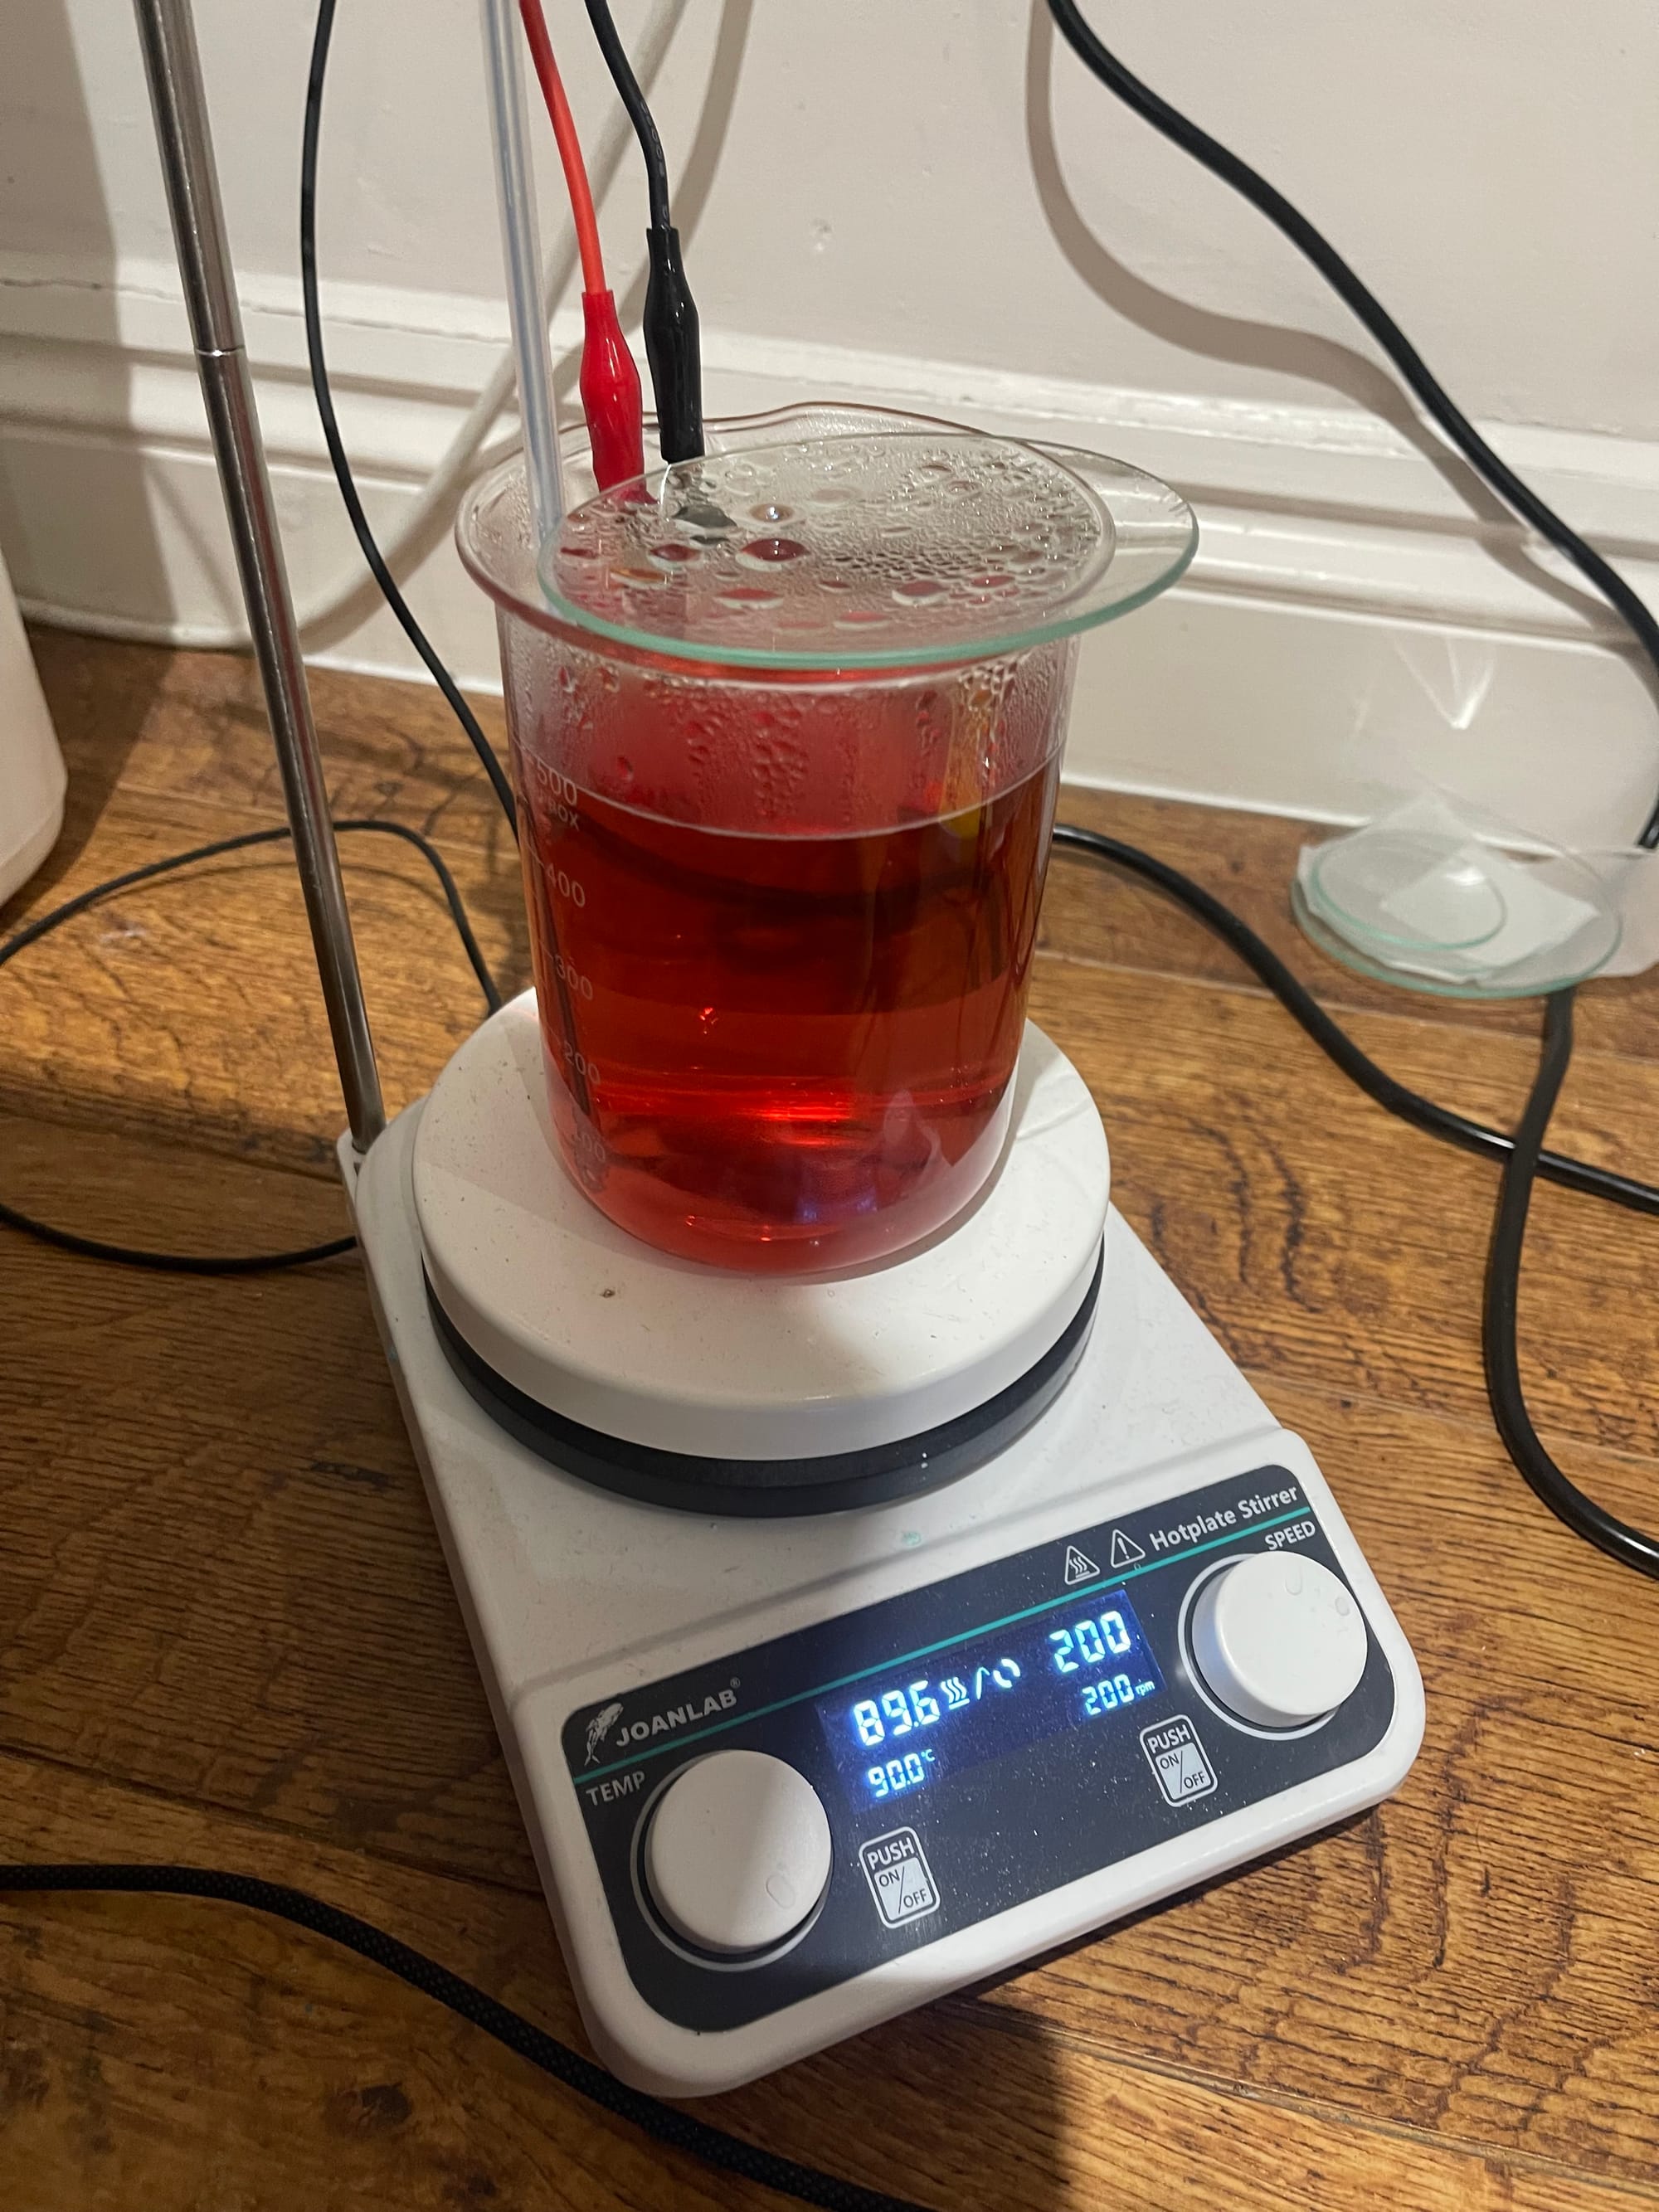
Once you reach the ruby-red colour, you can stop the process. At this point, your job is done, and we can move on to testing the final product to determine the concentration. You can continue the process for stronger concentrations, but this can lead to aggregation (clumping), making the colloidal gold less effective.
With your finished product, you can now decide whether you want to filter it using coffee or filter papers. However, it’s important to note that this step is not required and can actually introduce contamination into your colloidal gold. This is due to the chemicals that may leach from the filters.
Only filter your solution if you notice visible particles that you’d like to remove. If your colloidal gold appears clear and free of debris, it’s best to skip this step.
Testing Your Colloidal Gold
Can you believe you’ve made it this far! Now, it’s time to test your final result. We’re going to perform a few tests and calculations to determine exactly what you’ve produced.
Concentration (PPM)
If you had the equipment and were able to get a starting weight of your gold, we can now calculate the concentration of your solution.
First, unclip your gold from the power supply, then dry it off as much as possible before taking the final weight.
With both the starting and finishing weights in hand, we can now calculate the concentration (i.e., the PPM) of your solution. To do this, follow the formula:
Mass of gold in MG / Volume of solution in Litres (500ml = 0.5)
For example, let’s say your starting weight of gold was 0.531g, and after completing the process, your final weight is 0.520g. This means you’ve used 11mg (0.011g) of gold during the process.
If your batch size was 500ml, the calculation would be:
11 / 0.5 = 22 ppm
That means I've got a 22 ppm, 500ml solution!
Unfortunately, if you weren’t able to get an accurate measurement of your gold before and after the process, you’ll have to estimate the concentration based on the colour. Without precise measurements, there’s no easy way to determine the PPM at home. The colour change (from pink to red to ruby-red) can give you a rough idea, but it’s not as accurate as weighing the gold.
Shining A Laser
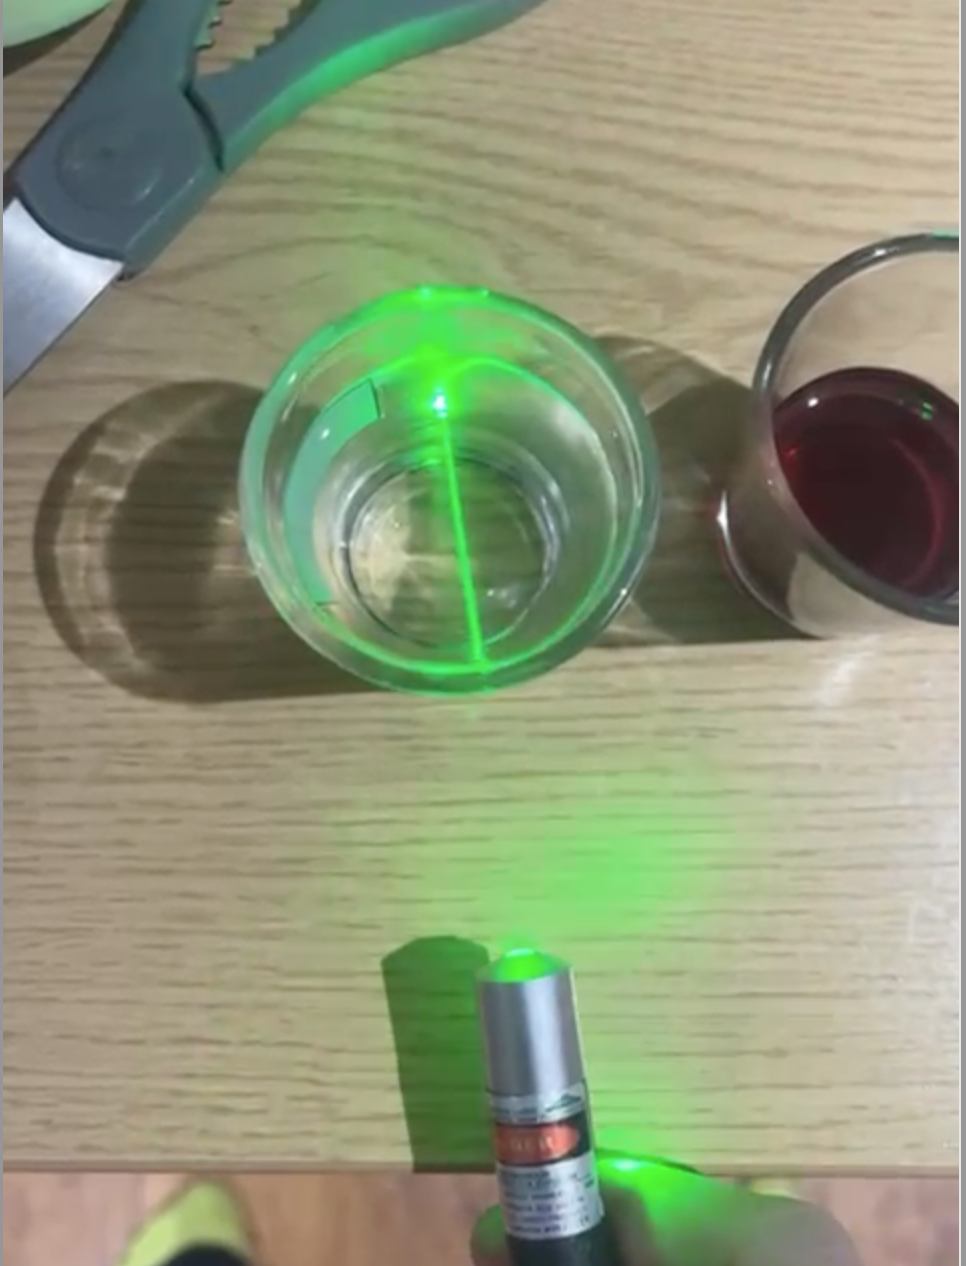
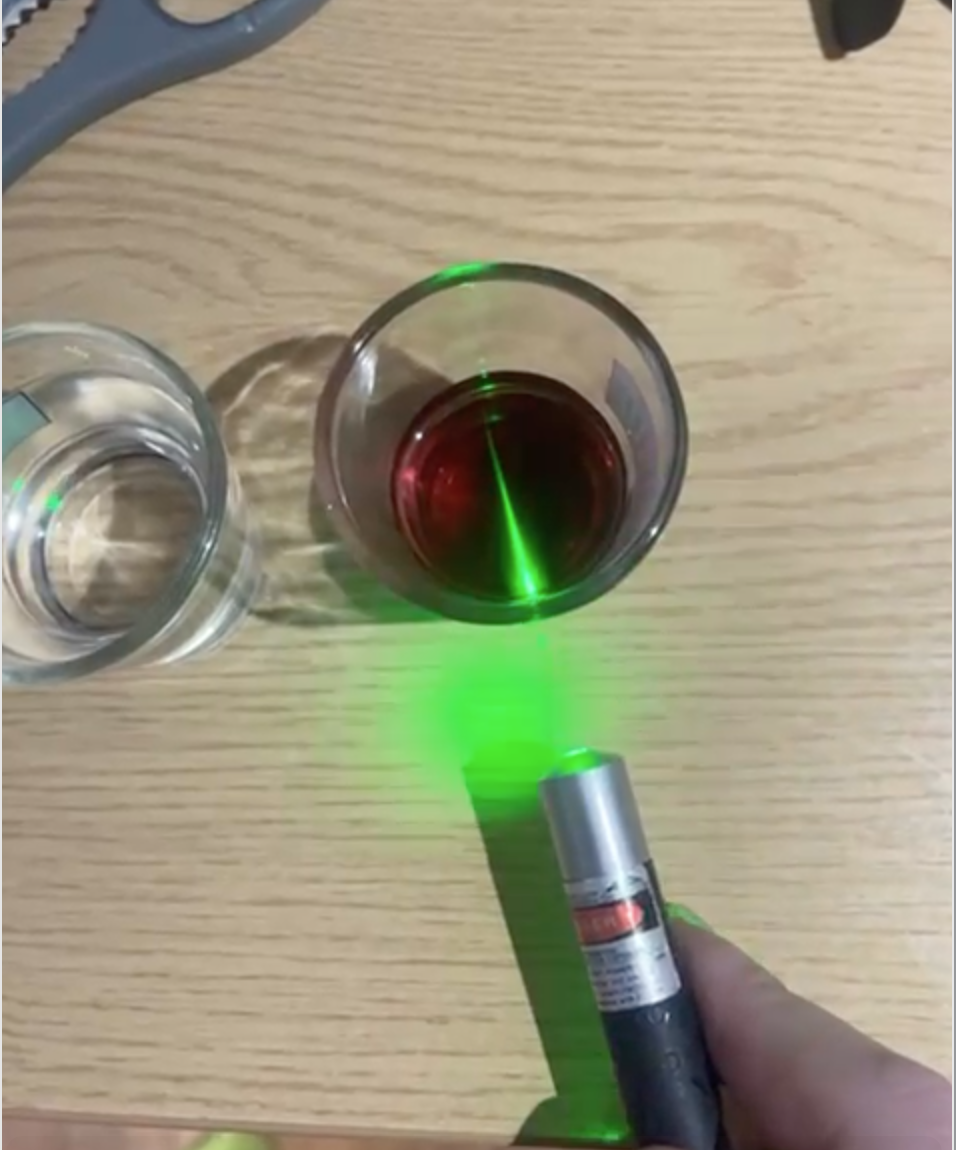
A second really cool test you can do, if you have a red/green laser, is shine it through your solution. If the beam is visible, it means you’ve successfully made colloidal gold! This is due to the Tyndall Effect, which refers to the scattering of light particles in the solution, making the laser beam visible.
PH
While not essential, testing the pH is a nice extra check for the solution you’ve created. You can test the pH using litmus strips or a digital pH meter. Ideally, you want the pH to be between 4 and 7, as that’s when gold particles are most stable. If you’re aiming for a stronger antimicrobial effect, the pH should be around 5-6.
Process Complete
Congratulations! If you’ve followed through with the process, you now have yourself a beautiful batch of colloidal gold 🥳. Hopefully, this guide was easy to understand and digest, but if you struggled with anything, feel free to leave a comment, and I’ll get back to you as soon as possible.
When/How To Consume
If your consuming the product you've made, here are a few guidelines that I recommend for dosage, timing etc.
Dose
Ideally, the dosages I’m about to mention should be taken on an empty stomach for optimal results. The best time for this is usually first thing in the morning.
Start with about half a teaspoon to see how you react. Keep this dosage for a few days. If you experience no negative side effects, you can gradually increase your dosage to 15ml per day. This is the maximum I would recommend for long-term consumption. However, for short-term use, you can go up to 30ml-50ml to give your body a “boost,” but ensure that you return to the lower dose after that.
Taste
Honestly, this stuff really doesn't have much of a taste — I guess it's like metal feeling, but nothing like tasting iron.
What Effects Will It Have?
Now the most important part is the effects you might experience when you start to consume this stuff. I'm going to list what's talked about online and then what I've experienced personally.
Online
- Enhance mental focus & clarity
- Improve memory function
- Elevate Mood
- Help aid joint stiffness
- anti-aging support
- Aphrodisiac
- Energy and physical performance
- Skin and beauty
- Spiritual & metaphysical uses
- Immune system and overall health
Personal
- Better, deeper dreams
- Cognition improvements
- Better intuition
- Mood enhancement
As you can see, the benefits I’ve experienced are similar to what’s often discussed online, though I haven’t noticed all of them. Nevertheless, this has still been a game changer for my nutrition, and it’s definitely taken my health and cognition to the next level.
Storage
When it comes to storing your colloidal gold, there are a few key points to keep in mind.
- Store the solution in a cool, dark place to prevent unwanted reactions over time.
- Amber bottles are ideal for long-term storage, as they block light. which helps prevent bacteria growth, oxidation, and other unwanted side effects.
However, if you're not storing it long-term, this might be overkill. Glass bottles are perfectly fine in most cases.
Next Batch Tips
If I’ve done my job properly, you’ve now successfully completed this process once, and you can easily repeat it in the future. However, there are a few improvements you can make:
- Colloidal Gold Starter: If you save around 20ml from your previous batch, you can pour that into your new batch when you add the chemicals. This will speed up the process since you won’t need to generate the original gold ions to kickstart the reaction.
- Invest in better equipment: If you’re planning to do this process regularly, investing in higher-quality equipment will save you time and hassle. This can turn the process into more of a “set and forget” situation, rather than requiring constant monitoring.
- Better clamp system: Consider investing in a helping hands or clamp setup, which you can find online at a reasonable price. This will make it much easier to hold your wires in place and improve the overall setup.
What Happens With Impure Ingredients?
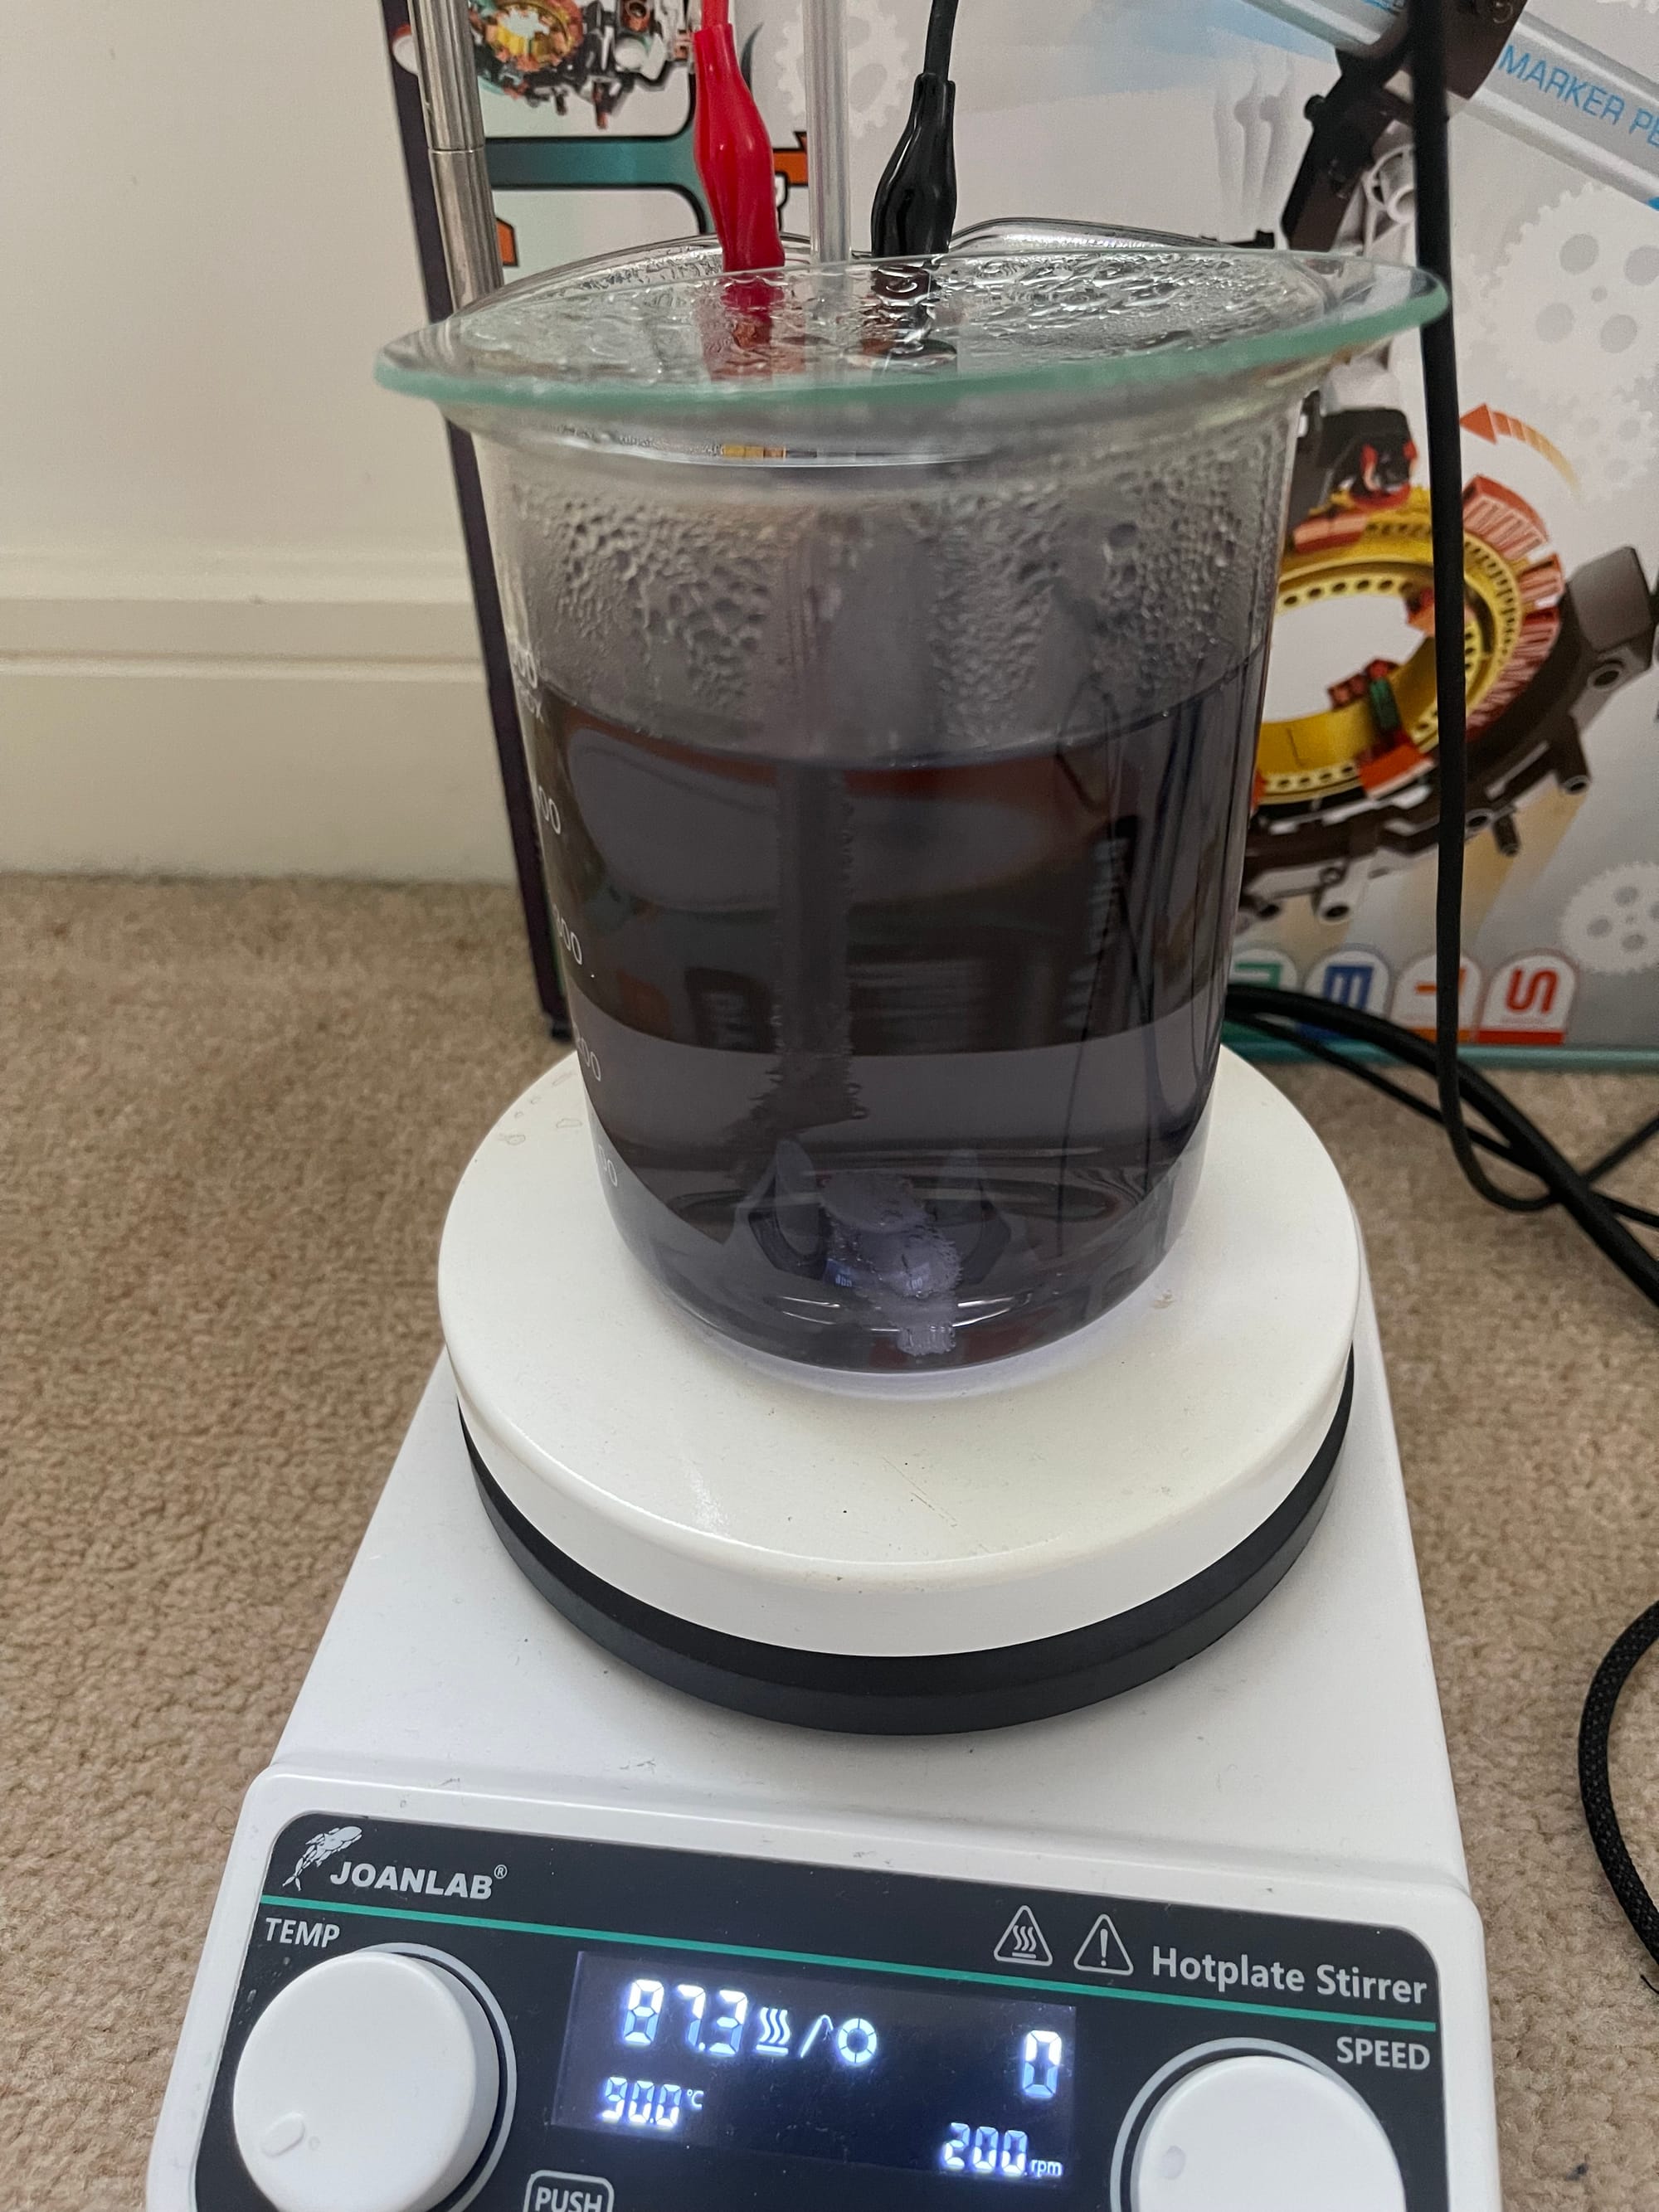
When you’re not using distilled water or your metals aren’t of high quality, you can introduce impurities into the solution, which may cause the water to turn black. This happens because of the unwanted byproducts created during the process. For a clear example of what happens during electrolysis with tap water, check out the following video.
I recently made a batch myself using impure salt, I made the mistake of just using a random table salt. My solution ended up turning from pink to purple to dark purple to grey and then black.
If you do decide to buy your own
If after this entire process — you've still decided you want to buy you own, I have a few tips for finding the best quality products.
- Make sure you get the right PPM.
- Check the PPM and volume of liquid you are getting, this ensure you get the best price for what you are paying.
- I'd personally stay away from concentrations, as they tend to be more expensive
Products I Personally Use (UK based)
If you're not based in the UK, you can still find this products around online. It will just require a little bit of searching.
- Joanlab Hot Plate: Link
- Milligram Scale: Link
- Tri-Sodium Citrate Dihydrate (Sodium Citrate): Link
- Filter Papers: Link
- Sea Salt: Link
- Corn Syrup: Link
- Gold Leaf: Link
- Gold Bar: Link
- Gold Wire: Link
Commonly Asked Questions
How far does the gold have to be in the water?
It doesn't matter, but the more gold in the solution the higher the surface area — so it could change the time the process takes to complete. Just try and ensure the metal on your negative wire (black) has equal or more surface area if possible.
Why is it taking so long to change colour?
This depends on the strength of your power supply, and the size of your batch. So you might not see a colour change for a good 20-30 minutes. Providing your metals are in the water, and bubbles are appearing on the negative wire (black) the process is working — you just have to give it time and stop being so impatient 😂
What colour should I finish with?
The best colour to finish with is ruby-red, as it has the smallest particle sizes, and contains a high enough concentration to be effective. The first time you make this though you might not realise how red ruby-red is, so keep it going until it's really red almost purple.
How do I test the PPM of the solution I've made?
You'll need to take a measurement of your gold before and after, from this change in weight, and the volume of the solution you've made, you can figure out the PPM. See 'Testing Your Colloidal Gold' section.
What happens if the colour changes from pink to purple to dark blue / grey
This means you've introduced some type of impurity, whether that's your salt not being pure enough or not using 0tds water. This has caused your particles to get too big and cause aggregation (clumping) of the gold particles. Unfortunately, the best thing you can do here is start the batch again.
Video Of This Process
I will be coming out with my own video shortly, but in the meantime I thought I'd link a video similar to this process.
Studies
https://www.tandfonline.com/doi/abs/10.1080/13590849762411

